Sleep in A Jeep Wrangler!? JKU Bed Platform & Storage Step-By-Step How To Build It
Getting Good Sleep In A Jeep Wrangler JKU
After running my original Jeep Wrangler JKU Bed & Storage Platform for a couple of years I had learned a lot. I spent well over 100 nights in that one (click here to see that version), understanding what was working and what wasn’t. This new build, I’m calling Jeep Wrangler Bed & Storage Platform Version 2.0, is so much better! It not only cost less than $200 to build but has so much more storage and much better use of space than version 1.0.
IMPORTANT!
There’s a new build! Check out that article (and this one you’re reading) to compare the different build details!
DIY Jeep Wrangler Bed: Sleeps 2 With An RV Cooler Shelf—How-To Build It
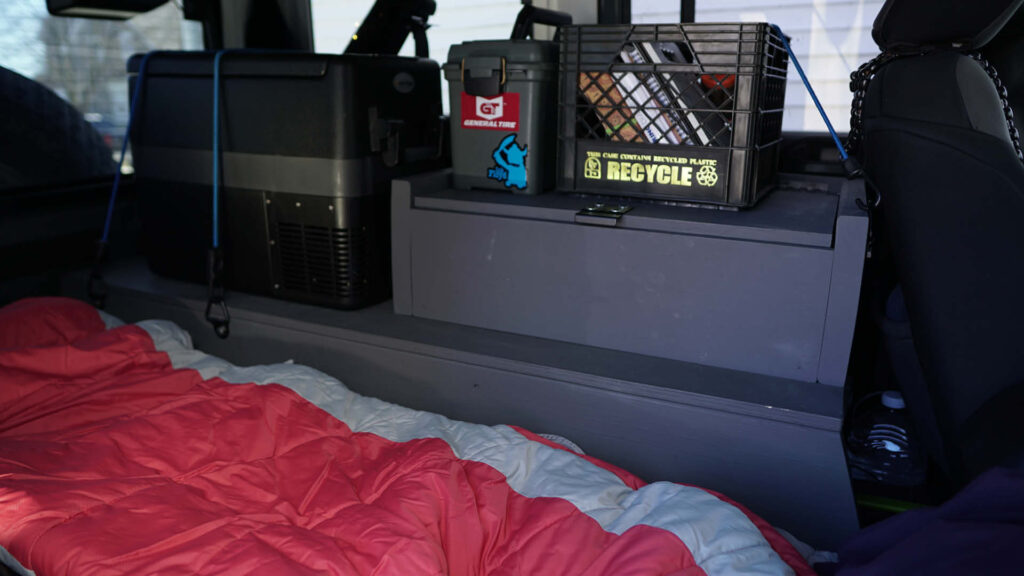
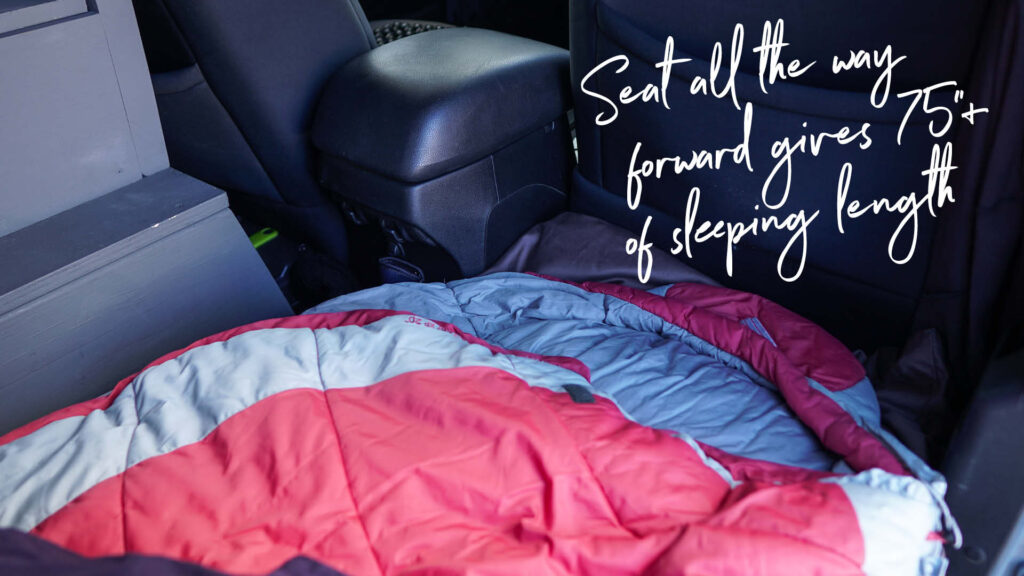
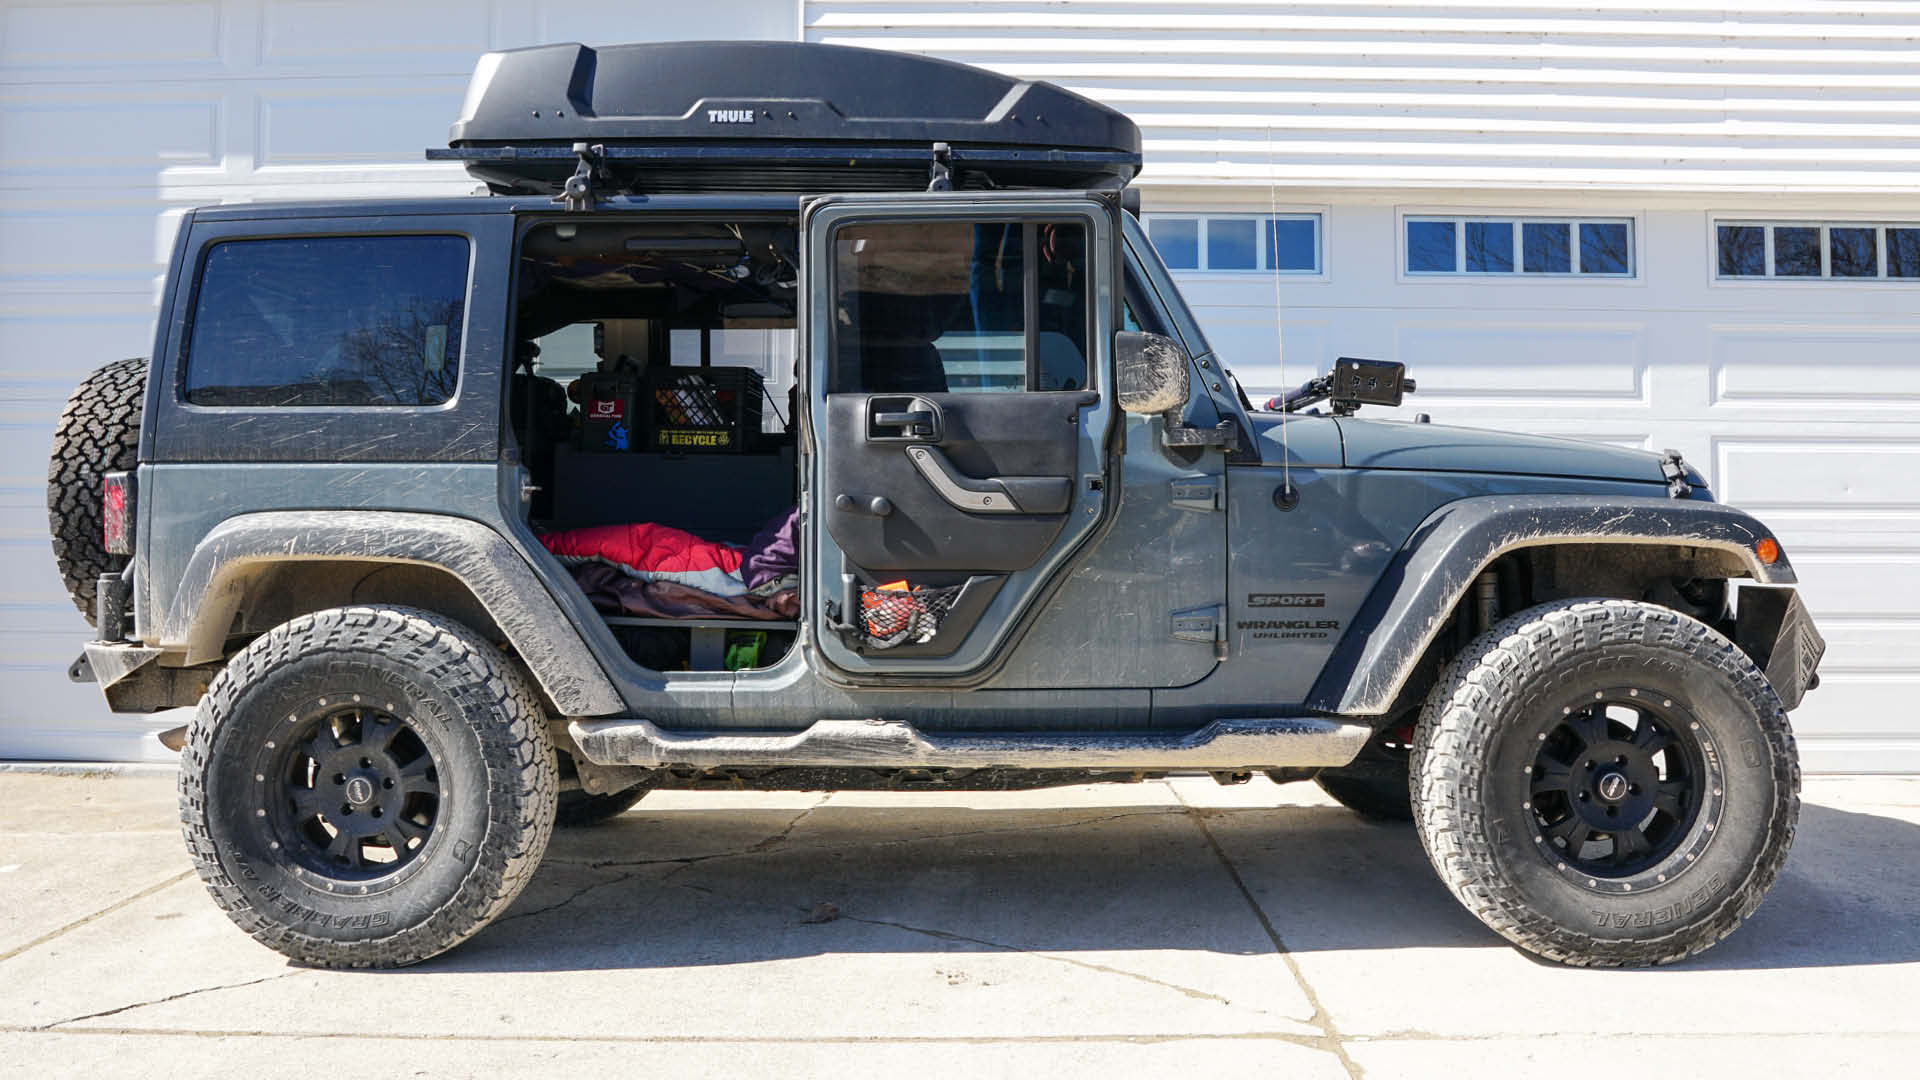
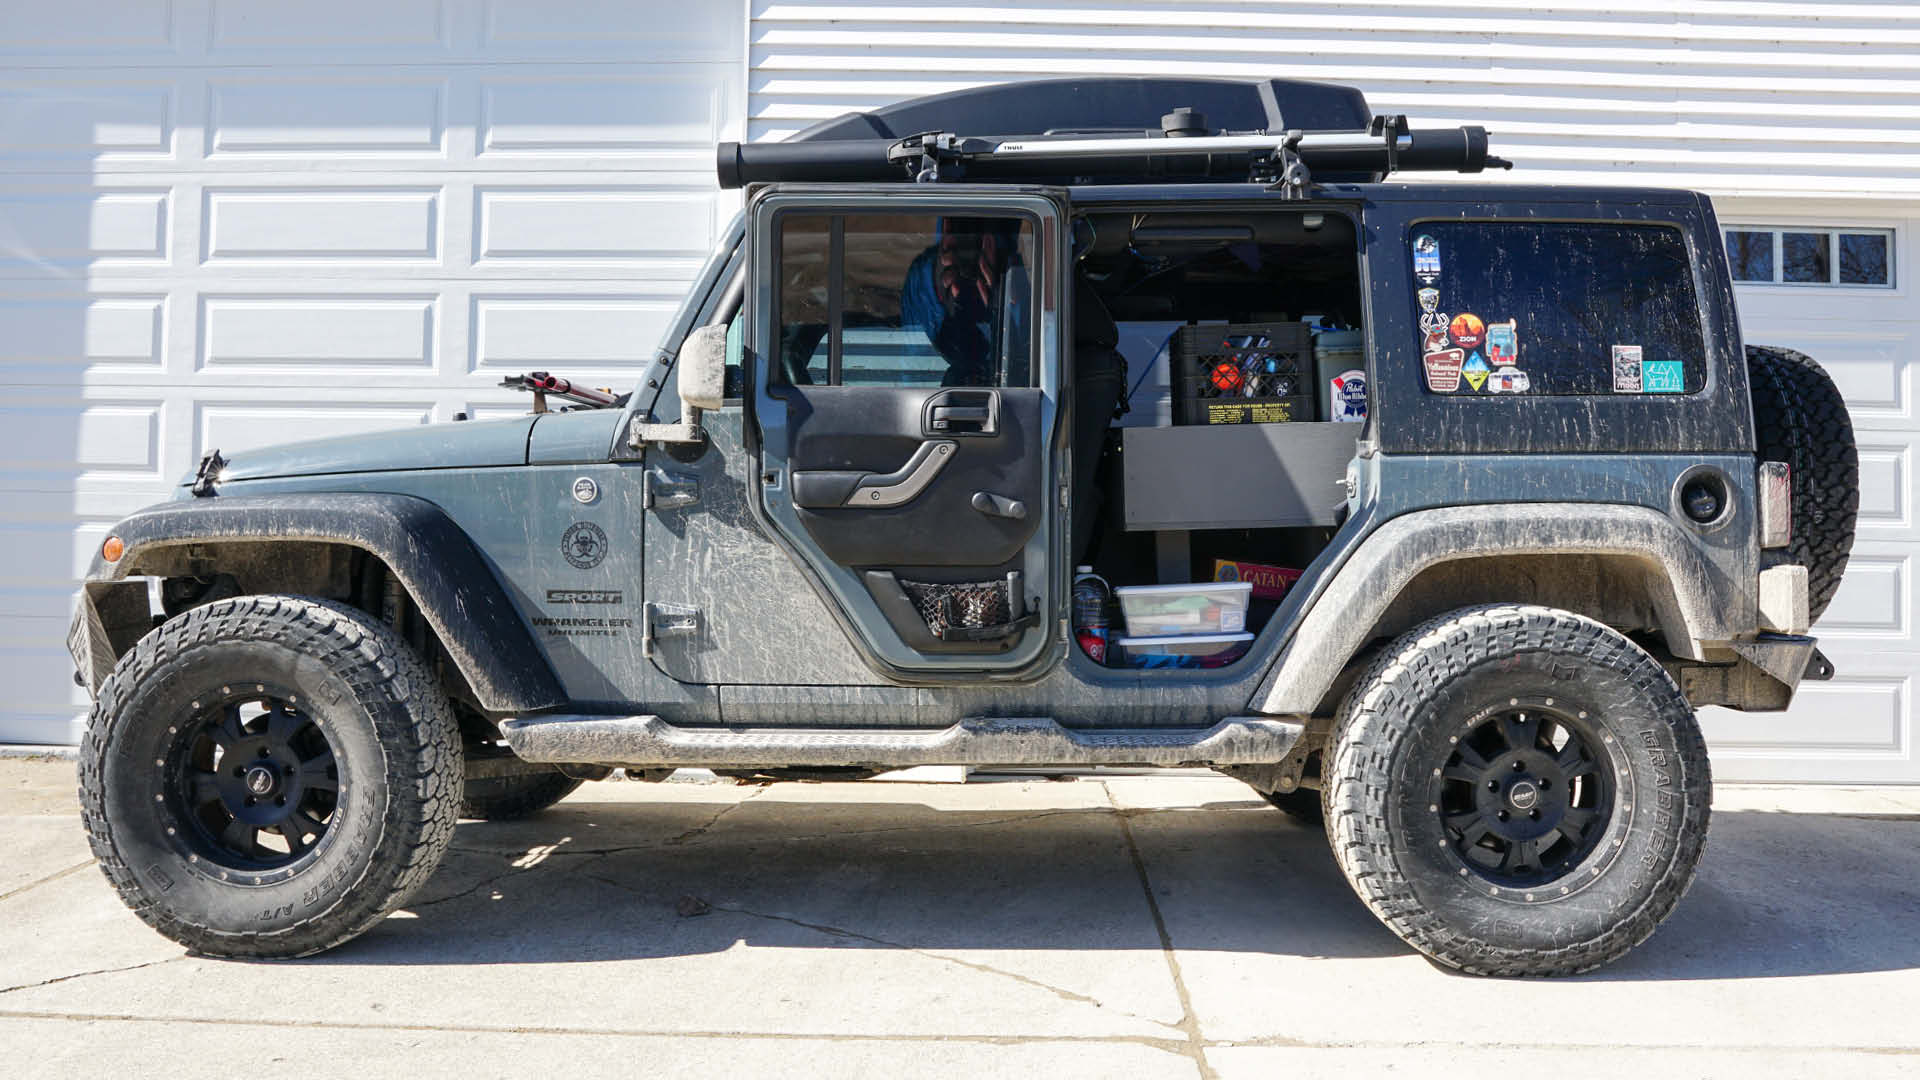
If you want to sleep in a Jeep Wrangler, a JKU is pretty much the only comfortable way to go. This setup, with the front passenger seat forward, gives 75+ inches of room, 24″ wide at the feet and about 30+ at the shoulders. Combine the hinged accessibility of extra space for storage under the sleeping platform and it’s a nice multi-functional use of that space.
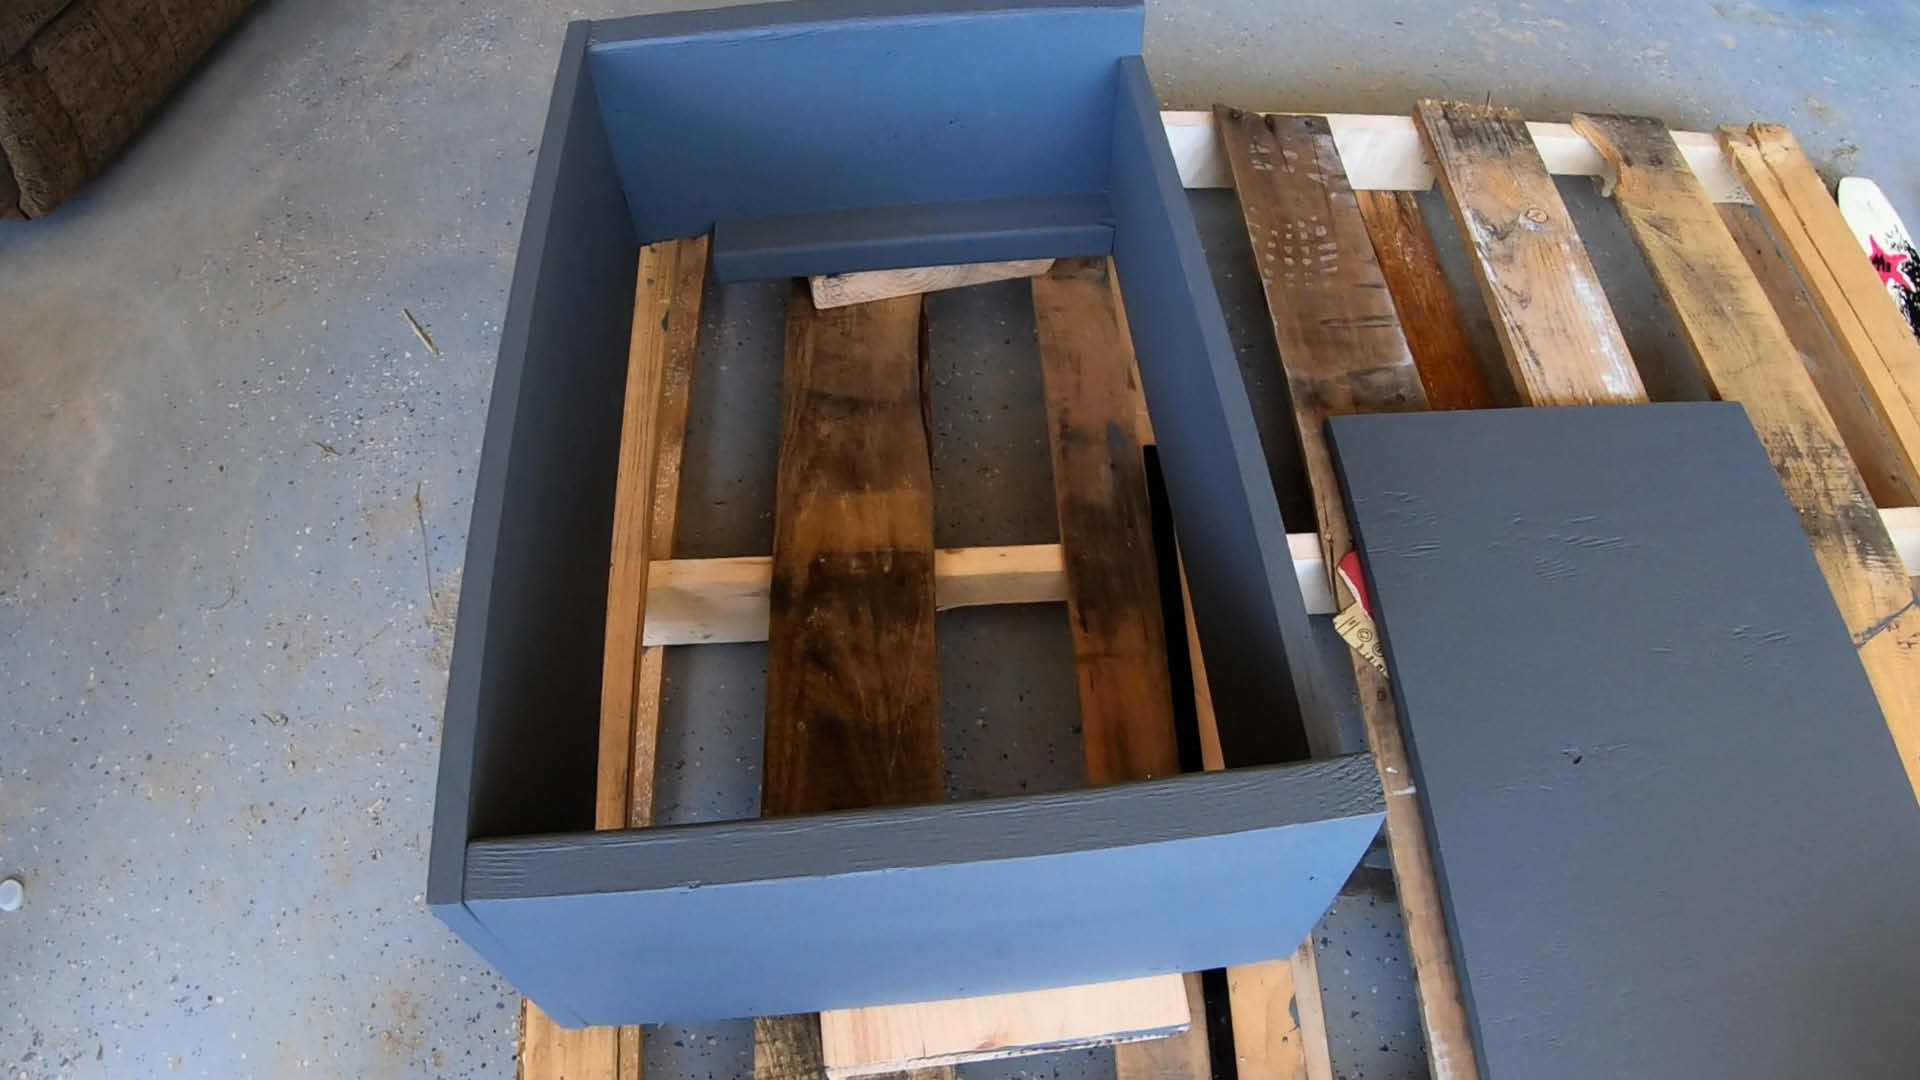
NOTE: This article is for reference only! Measure your rig multiple times and build to your own situation and details!
This site participates in the Amazon Services LLC Associates Program and other affiliate programs and may earn from qualifying purchases. You’re never charged more, but it helps out little by little! Check out “Privacy” in the top menu if you need to know more!
Time: +/-16-20 Hours
Estimated research, planning & build time. Should go faster with more hands & this article!
Materials Cost: +/- $200
Obviously might change depending on what you have on hand or tools you might need to buy.
Parts & Materials
| Parts & Materials | QTY | Purchase Links | Notes |
| Piano Hinge 48″ (Bronze) | 1 | Amazon | Could use 36″ |
| Piano Hinge 24″ (Bronze) | 1 | Amazon | Cut to length |
| Heavy Duty Drawer Slides | set (2) | Amazon | I used 32″ |
| Black V-Ring Tie-Downs | set (8) | Amazon | I used 8 total |
| Lid Support Hinge | 1 | Amazon | |
| Wood Glue | 1 | Amazon | |
| 4’x8′ 3/4″ Birch Plywood | 1 | Sleeping platform & raised platform top | |
| 2″x10″x10′ | 1 | Raised platform sides (May need 12′) | |
| 1″x8″x10′ Pine | 1 | Drawer | |
| 2″x4″x8′ | 1 | Support “beam” & uprights | |
| Extra plywood | ? | Use what you have left or around for other planes | |
| Paint | 1g | Low VOC! |
Tools Etc.
| Tools | QTY | Purchase Links |
| Jigsaw | 1 | Amazon |
| Jigsaw Blades | 1 | Amazon |
| Circular Saw | set (2) | Amazon |
| Cordless Drill | set (8) | Amazon |
| Drill Bit Set | 1 | Amazon |
| Paint Brushes | 1 | Amazon |
| Sand Paper Variety | Amazon | |
| 12″ Combination Square | 1 | Amazon |
Other Gear & Accessories Seen On/In My Jeep Wrangler JKU
| Things & Stuff… | Purchase Links | Notes |
| 42 Quart RV Chest Cooler | Amazon | Still great after 3+ years of use |
| Bungie Nets – Attic Storage | Amazon | Not mine, but these look better sized |
| Thermarest Insulated Sleeping Pad | Amazon | Warmest pads I’ve ever used! |
| Powerlix Ultralight Sleeping Pad | Amazon | Thin, but good backup/extra pad |
| Goal Zero Yeti 400 | Amazon | See Full DIY How To Article Here |
| Heatshield Custom Fit Windshield Shade | Amazon | Worth the money |
| Coverking Custom Fit Seat Covers | Amazon | 6+ years running now… |
| Ammo Field Box | Amazon | Spare gear/parts storage |
| Thule Gutter Foot Pack | Amazon | |
| Thule Square Load Bars 60″ | Amazon | |
| Thule Force XT Cargo Box | Amazon | |
| Thule One-Lock Cylinders | Amazon | Worth it for a single-key system |
| Tuffy Metal Under-Seat Lock Box | Amazon | LOVE these heavy-duty lockboxes |
Planning & Design Considerations for Your Jeep Wrangler JKU Bed Platform:
Like I said, this build took into consideration a lot of things about how I used my first Jeep storage & bed platform build and how I planned to use this new one. Here are some details and reasons I did what I did. I highly suggest thinking deeply about these and expanding on these ideas so you can adjust for your own use case!
How I use and move around in the space — My first build I had room to sleep 2. That was really optimistic and never played out. (Sad trombone.) I gave up space for two to get a lower sleeping platform where sitting up and changing clothes, etc., was much easier.
Actual sleeping & space needs — I measured my sleeping pads and even boxed off a space (in my actual bedroom) to make sure I could sleep comfortably before building! I suggest you do the same!
Cooler & storage placement — I didn’t have an electric RV cooler in my old build and I realized that having that is key. Especially now, in hindsight, needing to keep insulin cold. So I designed the cooler space specifically and placed tie-downs accordingly.
Quick access to driver’s seat — Getting back and forth from the front seat without getting out of the Jeep is not only a convenience but a safety issue. If you need to go from sleeping to driving within seconds, this setup is optimal.
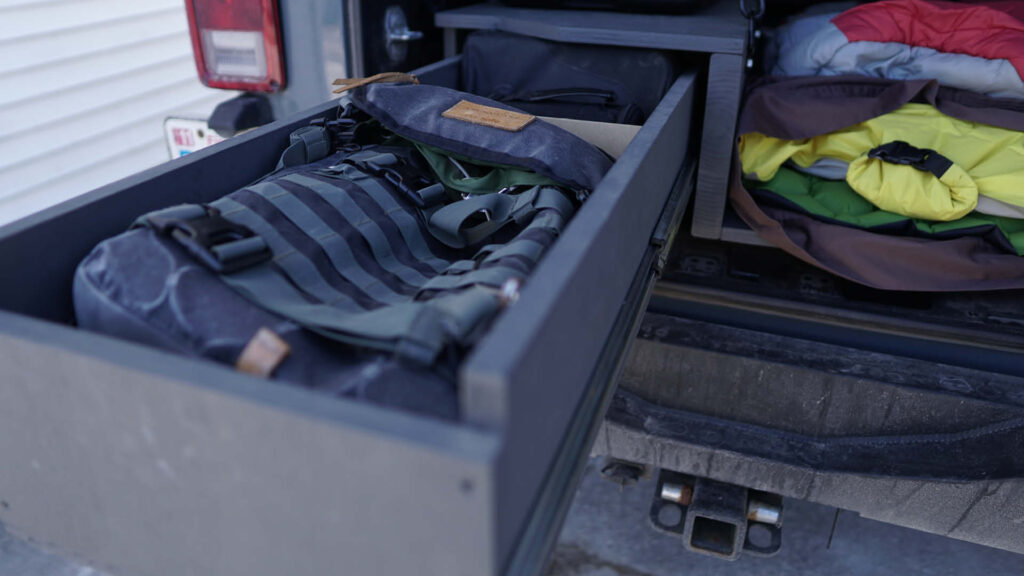
Locked storage — With the Jeep tailgate closed and locked, that drawer is really hard to get to. Not impossible, but at least it makes it one of the most secure places for valuables. I also run Tuffy lock boxes under my front seat and highly recommend them!
READ NEXT: DIY: Build A Custom Jeep Wrangler or SUV Roof Rack Tarp System… For Under $75
Jeep Wrangler Upgrades & Accessories to Make Your Jeep Life Fun as Hell!
Is Life An Adventure Anymore? Reflections from Camping in Cathedral Valley in Capitol Reef National Park
General Dimensions Used: Jeep Wrangler JKU Bed Storage Platform
I’m giving you general measurements here! Again, I think with variables between year and make and any aftermarket stuff you might have, you should start here and detail your own dimensions. Mine is a 2015 Jeep Wrangler JKU.
Main sleeping platform dimensions — 68.5″ & 62.5″ long (cupholder), 21.5″ (rear) & 29″ (door) width with angles around body
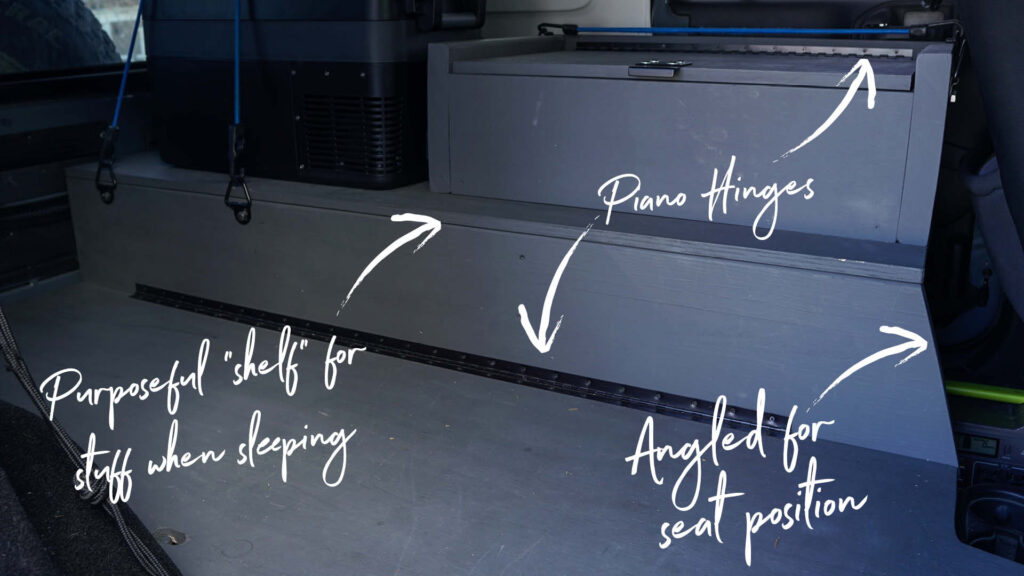
Raised storage sides/support — 62.5″ (bottom) & 60″ (top) angled to allow for driver seat
Raised storage top — 60″ long, 23″ at doors & 17″ at the rear with angles around the body
Drawer sides — 7-8″tall with 1/2″ plywood bottom
Upper storage compartment — 10″ sides & back, 8″ front, 29″x 19″ box dimensions
Support beams under the bed — +/-44″ total width
READ NEXT: DIY Jeep Wrangler Bed: Sleeps 2 With An RV Cooler Shelf—How-To Build It
Before you start building the bed platform
Some things to keep in mind before and during the actual build.
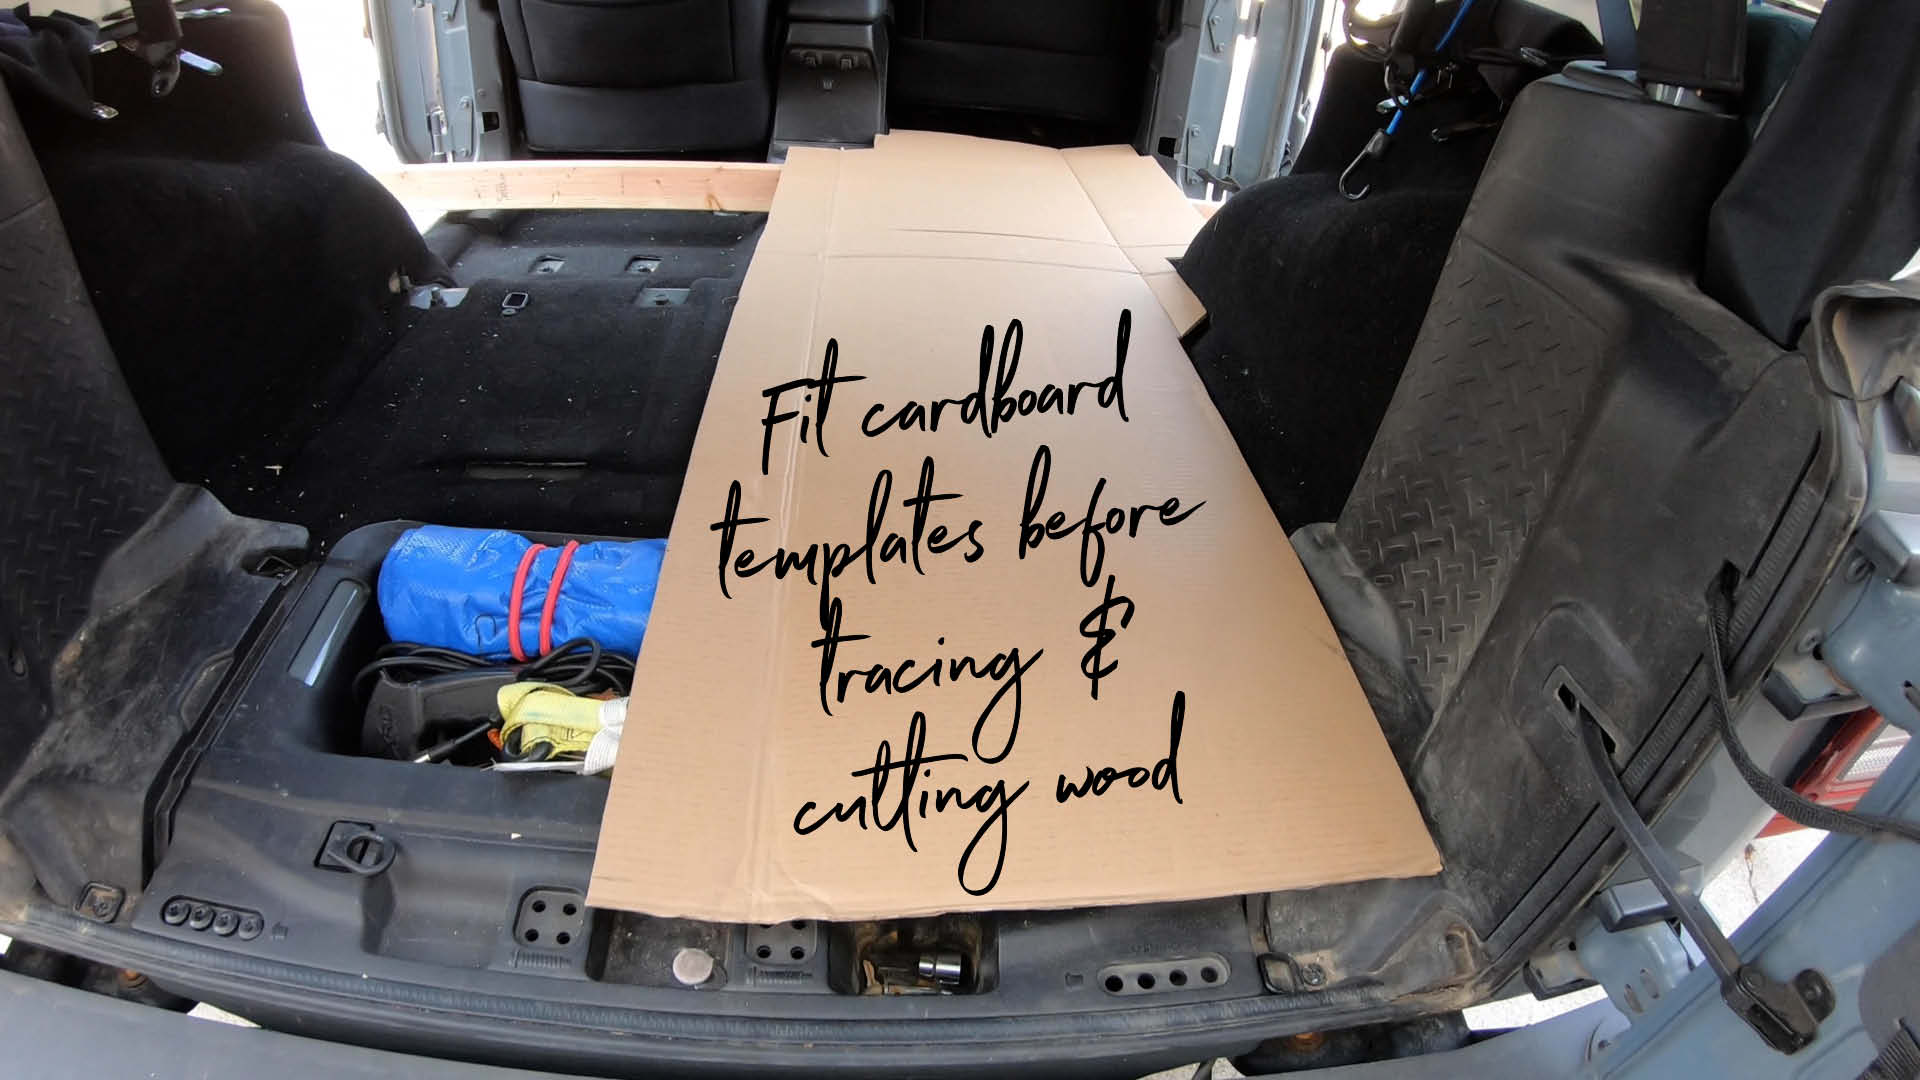
Cardboard templates for the win! Find or ask a friend for some big cardboard pieces. This is a huge time and money saver assuming it saves you from wasting materials! Plus, being able to “see” the platform in before cutting and be able to use your template pieces to start tracing on the wood is really helpful.
Build the bed and storage platform from the bottom up and adjust as you go as needed. Start with templates and the bed platform piece first. Raise up the upper piece to fit it. Build all that then confirm the upper storage box before cutting, etc.
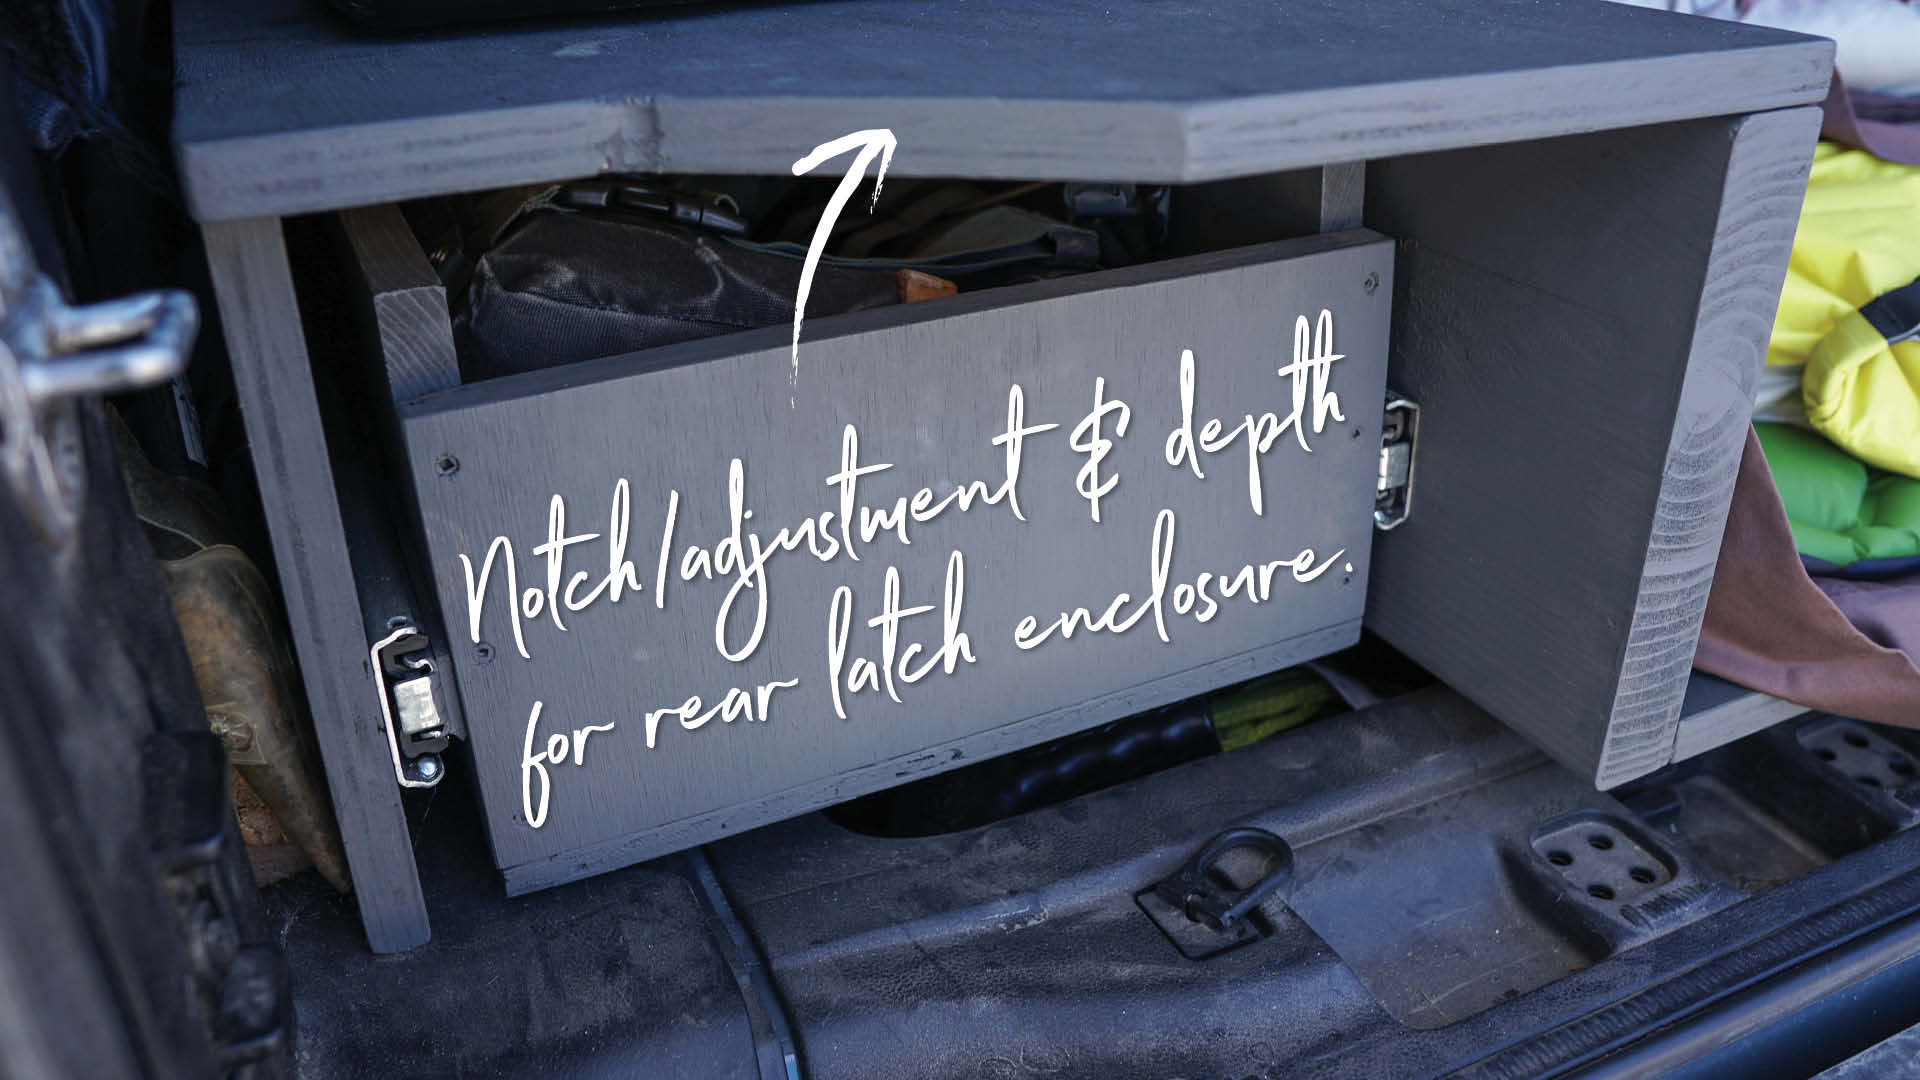
Adjust angles for Jeep body, etc. Pay attention to the Jeep tailgate latch enclosure, driver seat position, window crank accessibility, and cupholders.
Measure three times…cut once! Seriously. Whoever created that “measure twice” rule is way better at woodworking than me! That heavy-duty sheet of birch plywood is one of the most expensive pieces of this fairly inexpensive build, so don’t f*ck it up! 🤣
Step By Step: How to build your Jeep Wrangler bed & storage platform
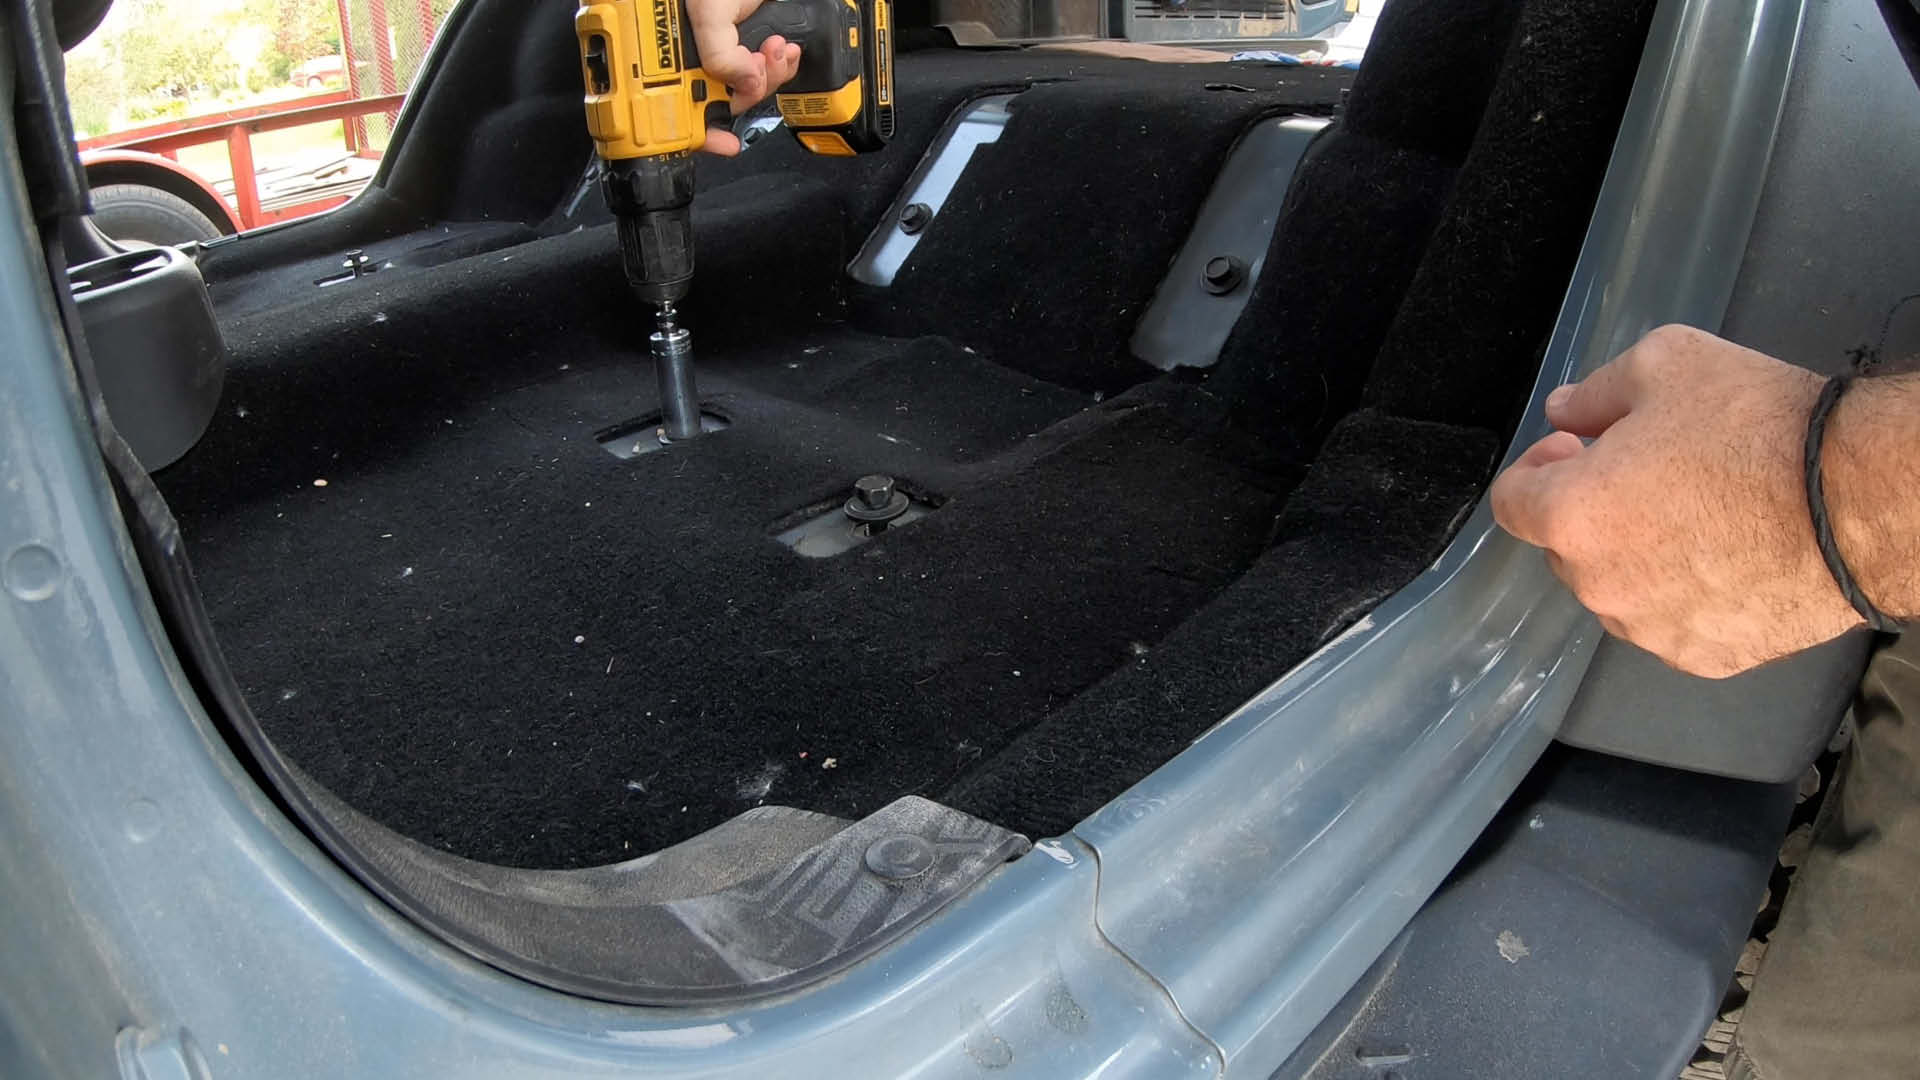
Step 1. Remove the back seats and cover for the OE jack stand and storage compartment. Removing these seats for the first time is a major pain, but once you break the Loctite it’s a breeze. Get yourself a long lever to put over your wrench/socket handle to give you some leverage.
Step 2. Using the general measures from above, grab a tape measure and detail on a sheet of paper and detail what your specific measures need to be. Keep in mind window cranks, center consoles, seat positions, etc.
Step 3. Using the 48″ T-square, transfer your measures to large pieces of cardboard to use for templates. Once you cut these out you can add too or take away material to get your fits just right. My final pieces looked like a cardboard Frankenstein. Go ahead and lay a 2″x4″ across the front since this replicates the support we’ll use and will keep things flush with the Jeep floor/body.
Step By Step: Constructing the raised storage platform sides
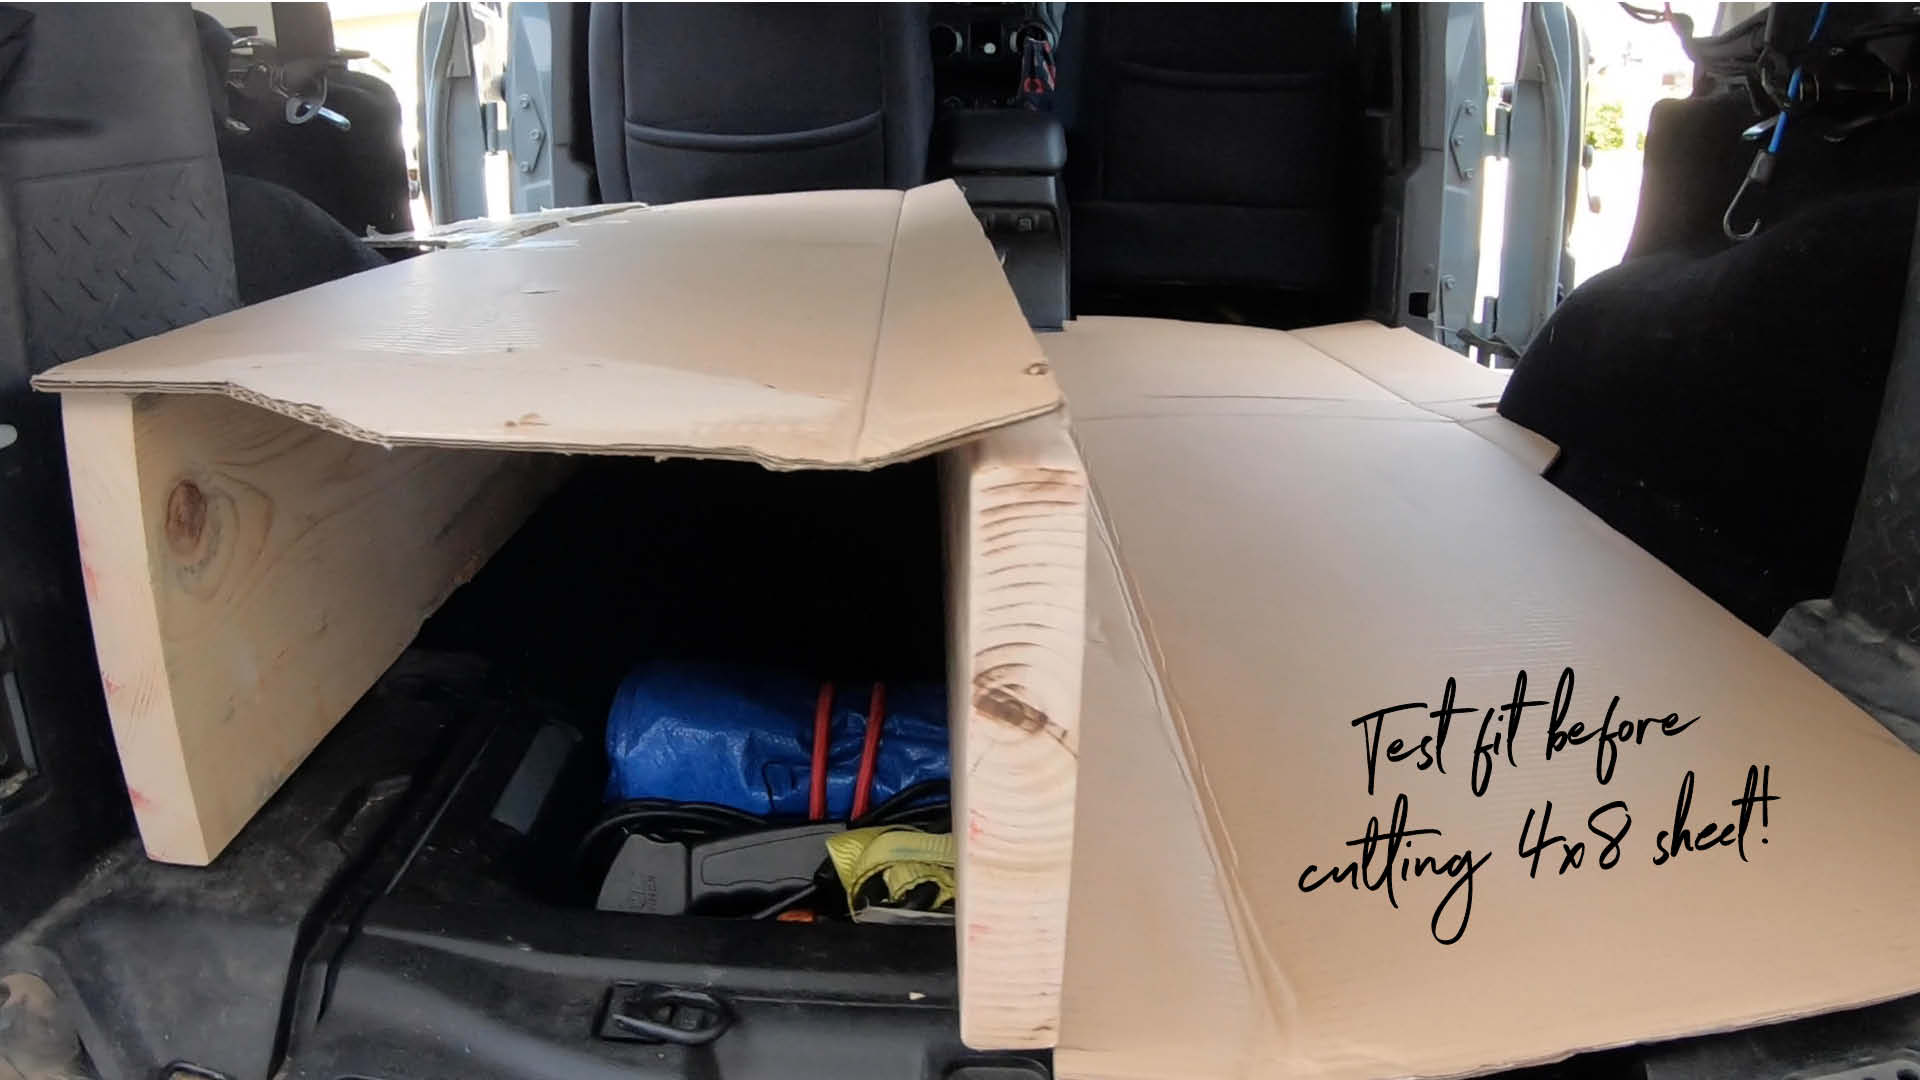
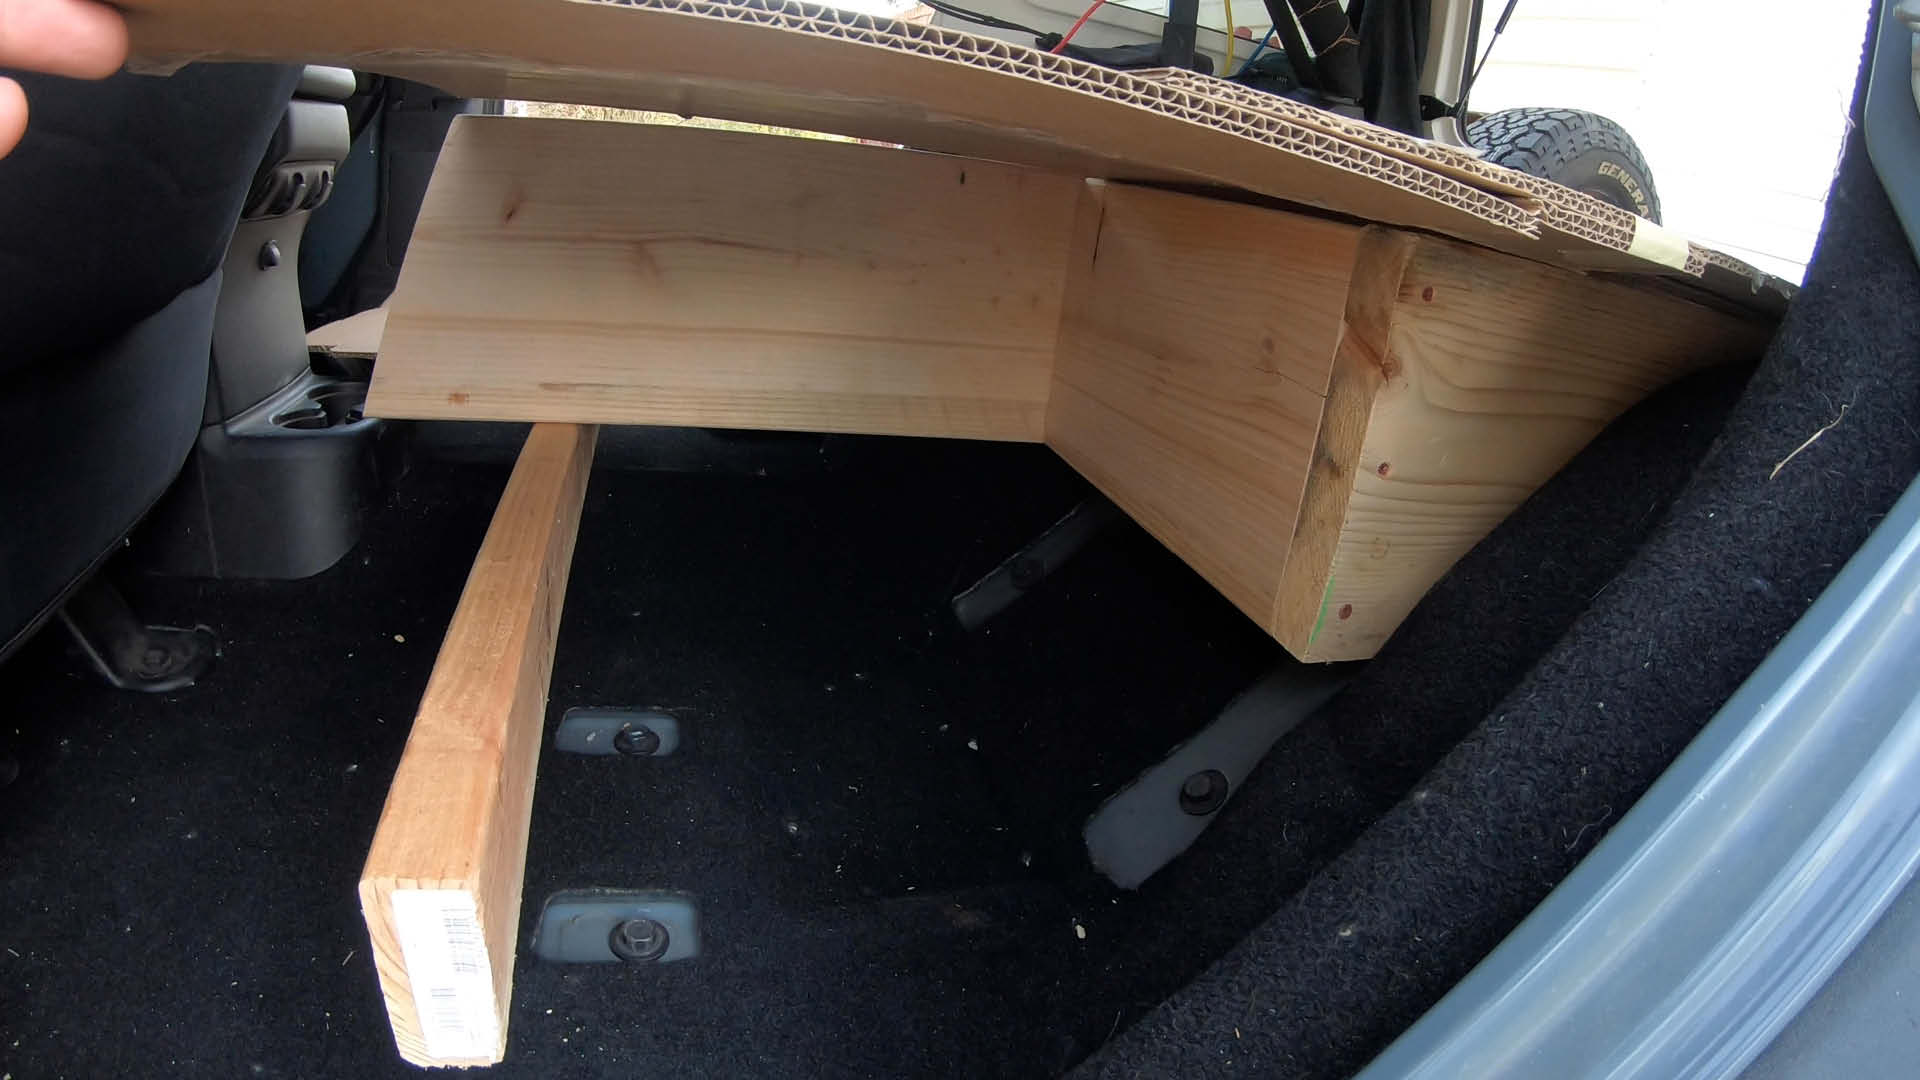
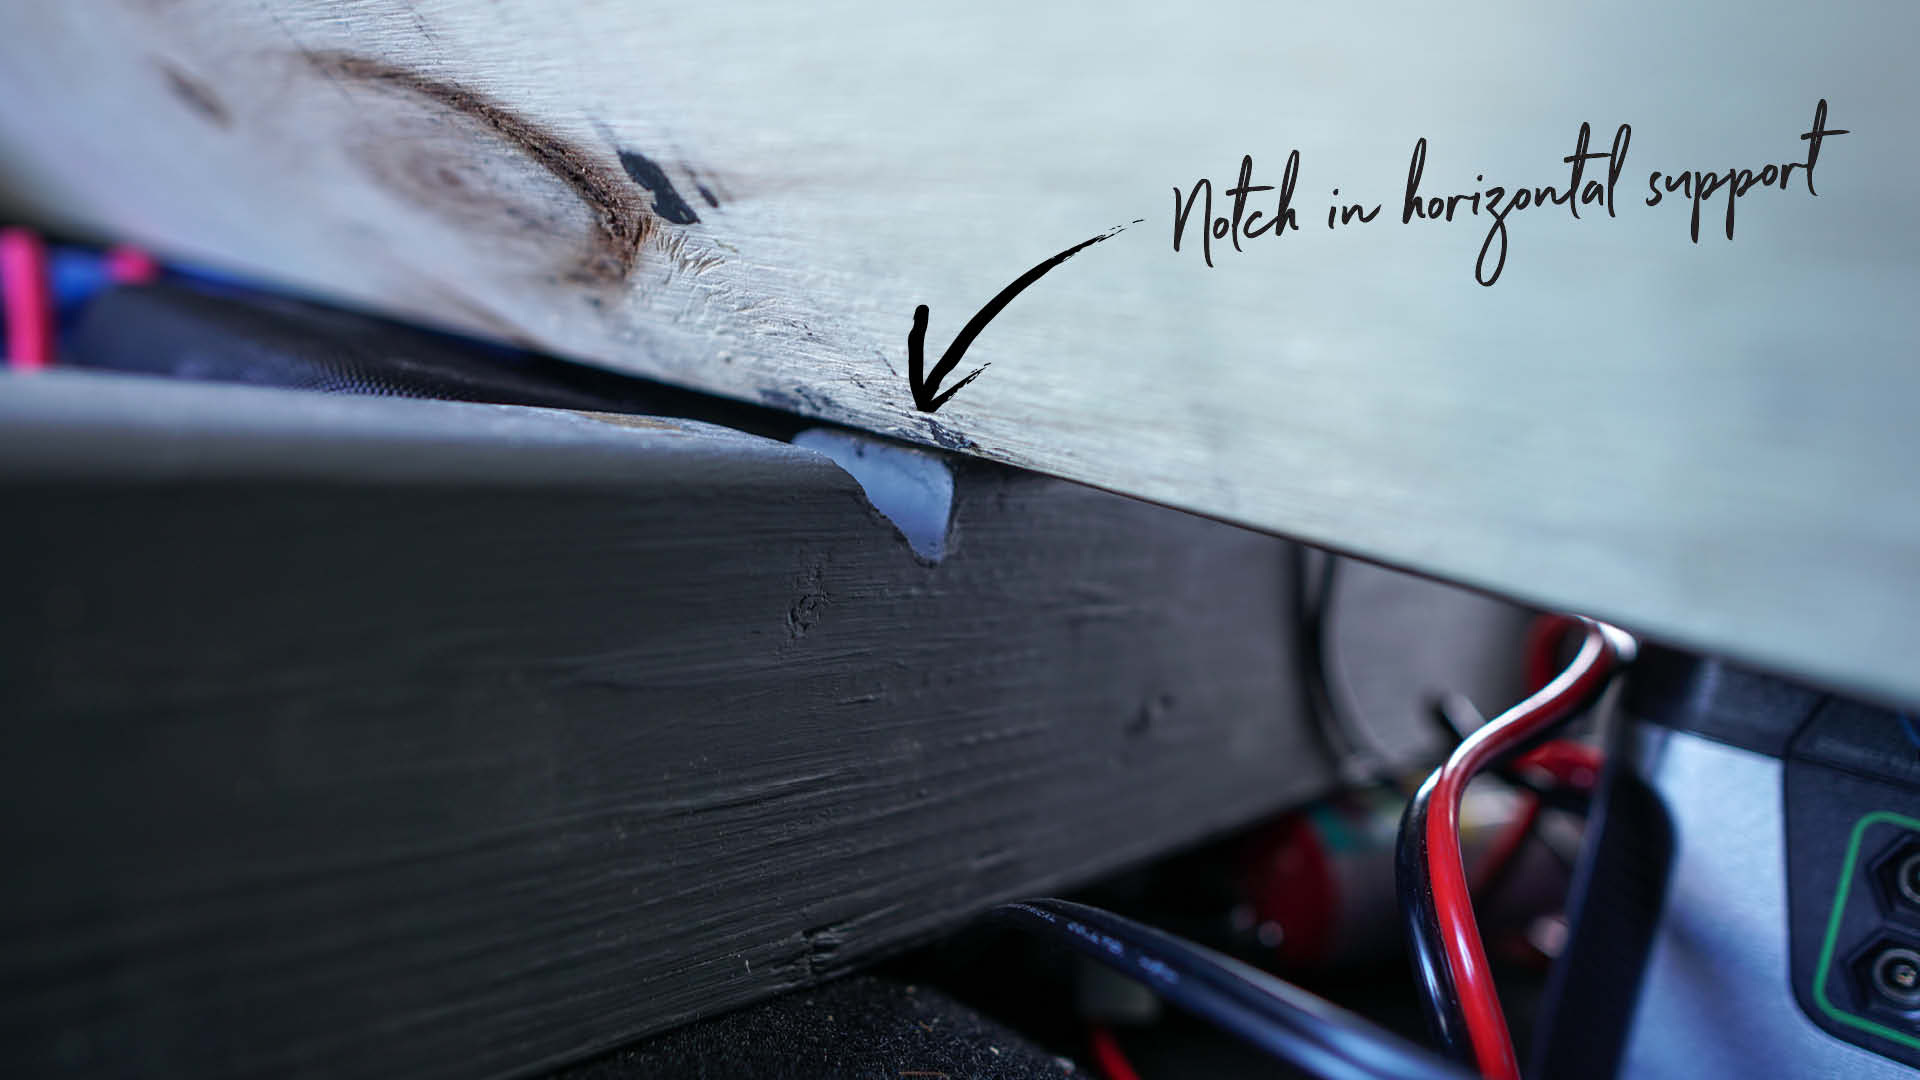
Step 4. Measure and construct the raised storage platform structure & test fit. Using the 2″x10″ (or whatever you chose), measure, cut and construct. Note that the middle spine behind the driver seat is angled and the outer is shorter to allow for the tailgate latch enclosure. The depth of the drawer compartment only needs to be an inch or two deeper than your drawer. Cut a simple notch out of the outer 2″x10″ to allow the body bold to stick up and for the wood frame to lay flush on the Jeep body.
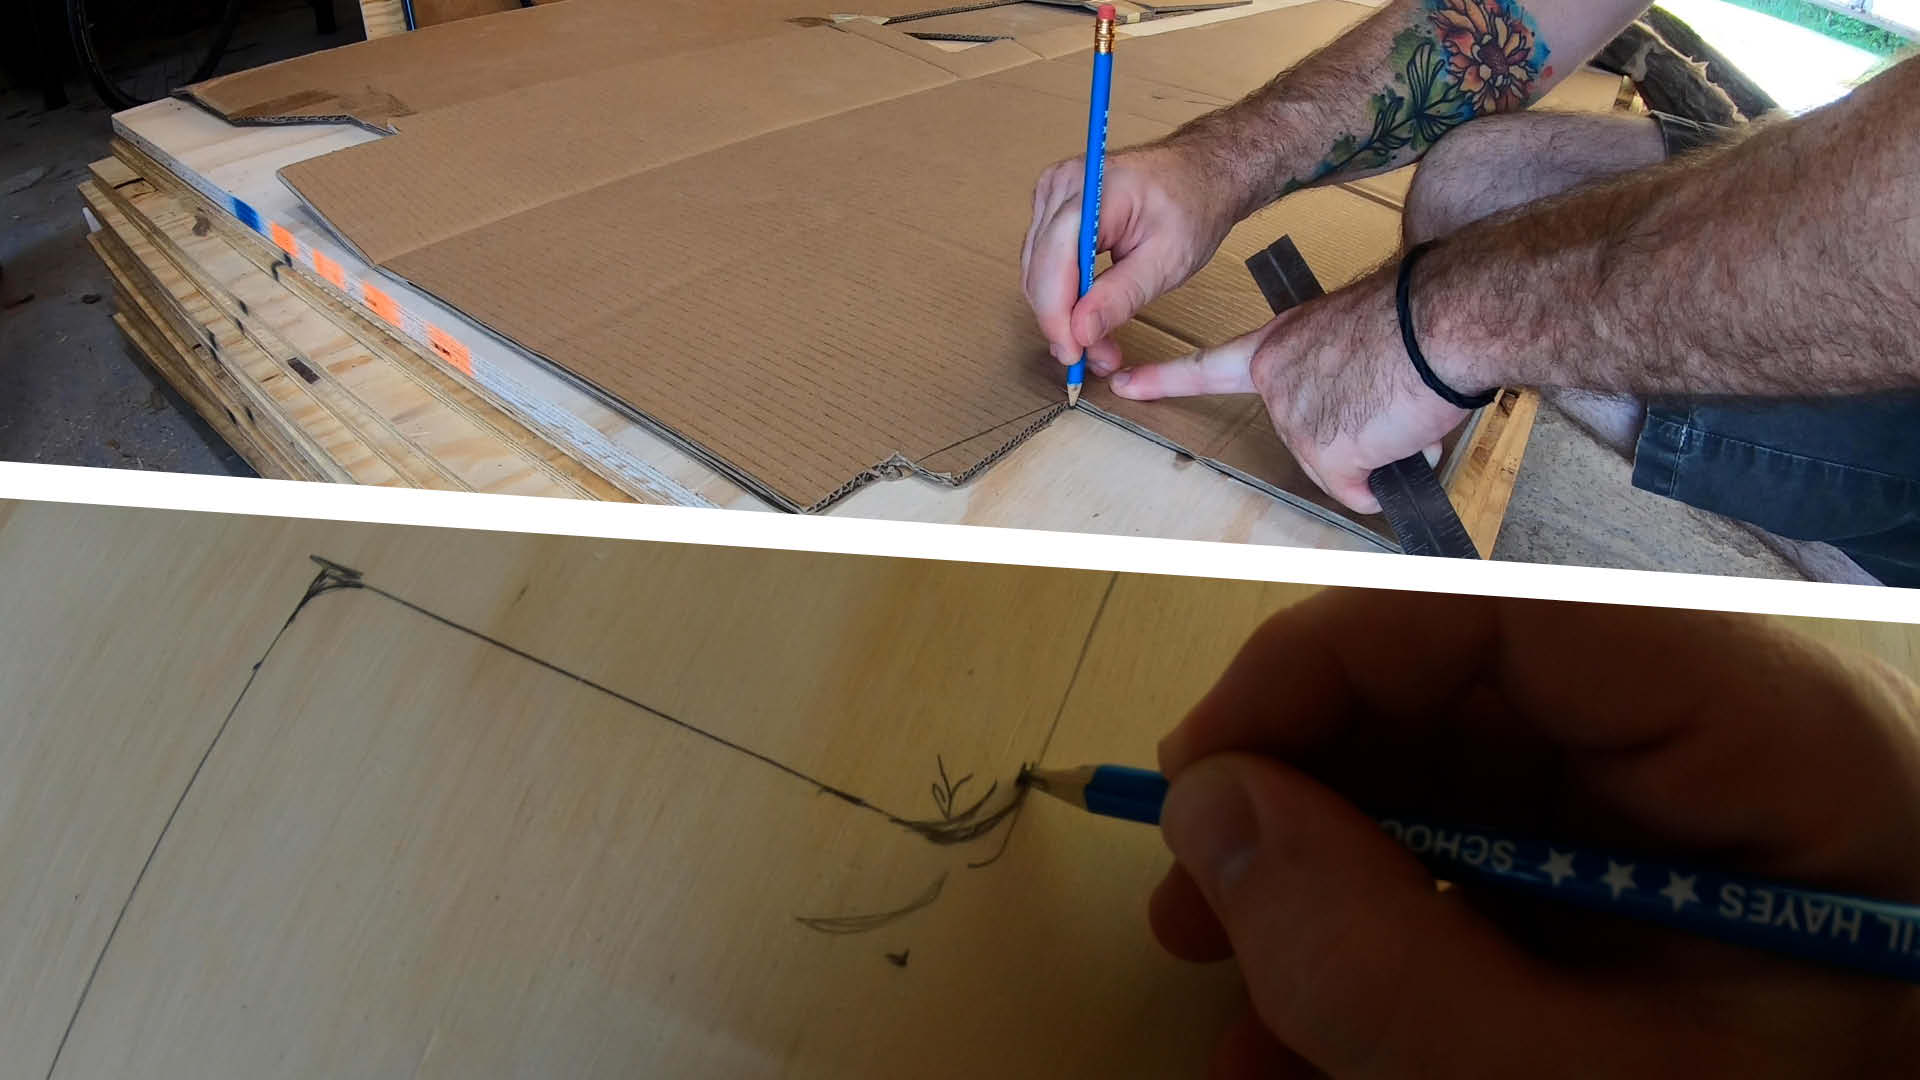
Step 5. Trace your templates to the birch plywood. Test fit everything again to confirm your Jeep bed platform and raised storage top are all correct. Then strategically position your cardboard templates on the 4’x8′ birch plywood to optimize your wood usage. Protip, flip one template over to nest the templates better and label top, bottom and which piece it is! Trust me on this! Round off outer edges.
Cutting the birch plywood & constructing the drawer storage box
Step 6. Cut only the Jeep bed platform piece first, then the raised top. Using a jigsaw and a circular saw if you choose, cut that big ol’ sucker out. Test fit it in the jeep with the raised platform structure in place and tip it up 45° as if the hinge were installed. Note the placement of the body bolts and drill those out if you haven’t yet. Once you’re solid on this piece, go ahead and confirm measures again and cut the raised platform piece. Protip: I used 1/2″ pilot holes at the inside rounded corners so I didn’t have to do that with the jigsaw.
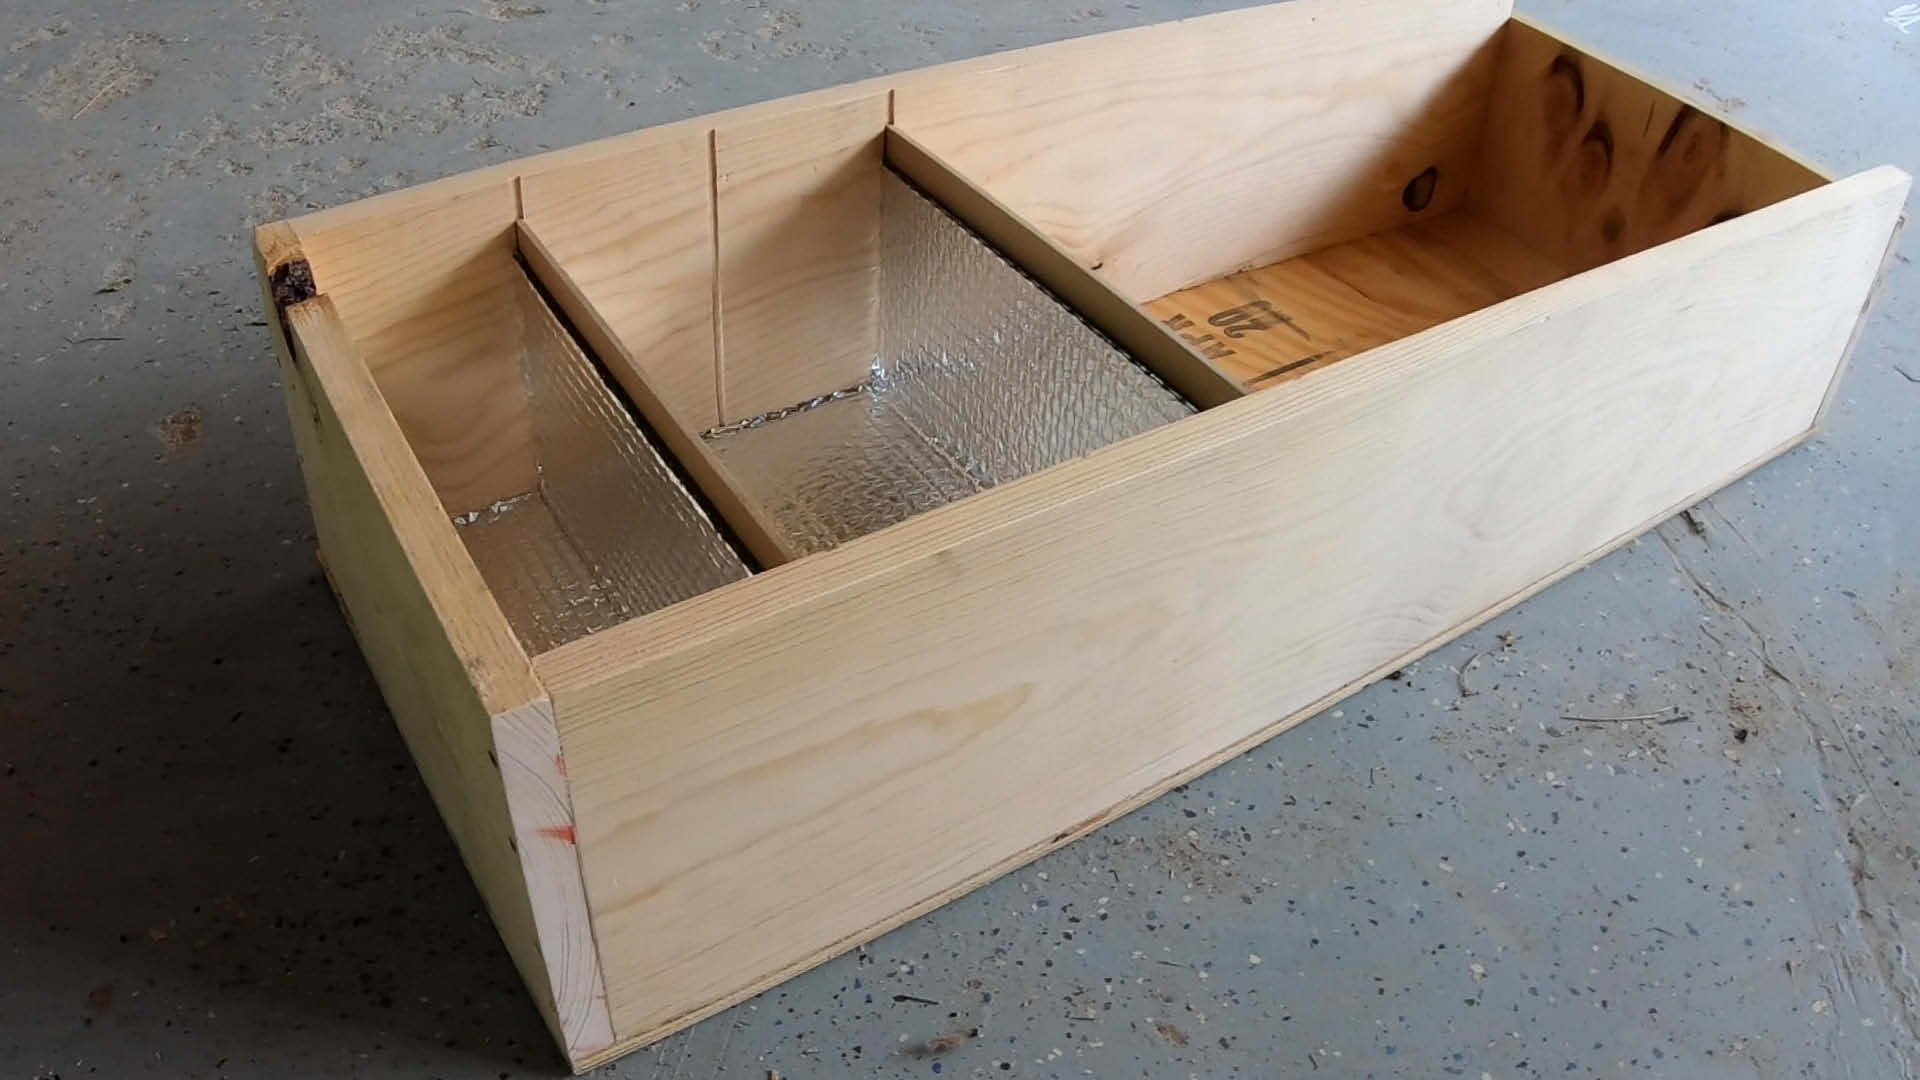
Step 7. Construct the drawer box. Make sure you take into consideration the material depth of the heavy-duty drawer slides and leave room for the tailgate latch enclosure. Nothing sexy here; 1″x8″ box with 1/2″ plywood bottom I had leftover from a previous project. No need for birch here in my opinion. I also had some rigid cardboard that I use as dividers so I ran 1/8″ slots on a table saw for those. Don’t install drawer slides yet. Wait until you’re done painting later.
Jeep Wrangler JKU Bed Platform: Constructing the support & upper storage box
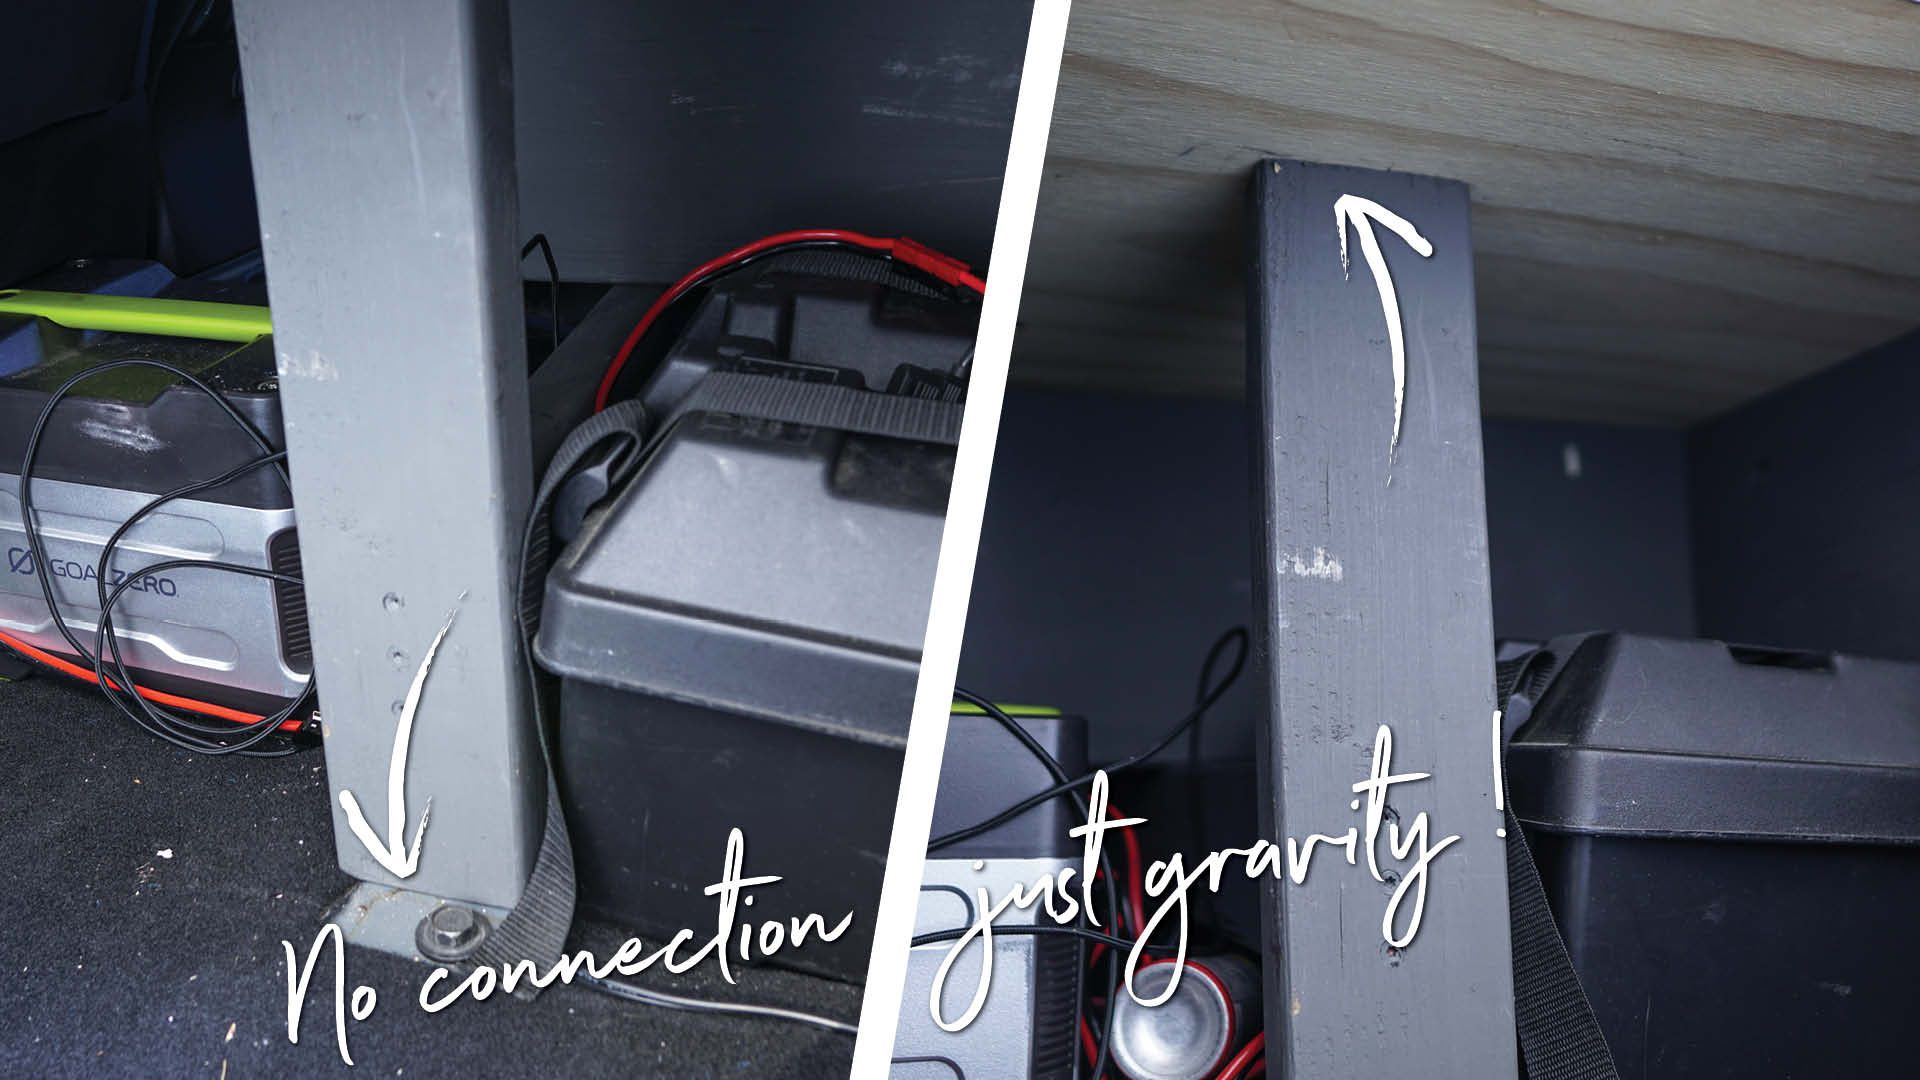
Step 8. Now that you have all the wood pieces laid in place, decide where you want the vertical support 2″x4″ pieces to rest on the Jeep body floor and build that piece. This is super minimal because we used that sturdy birch plywood which doesn’t need a ton of support.
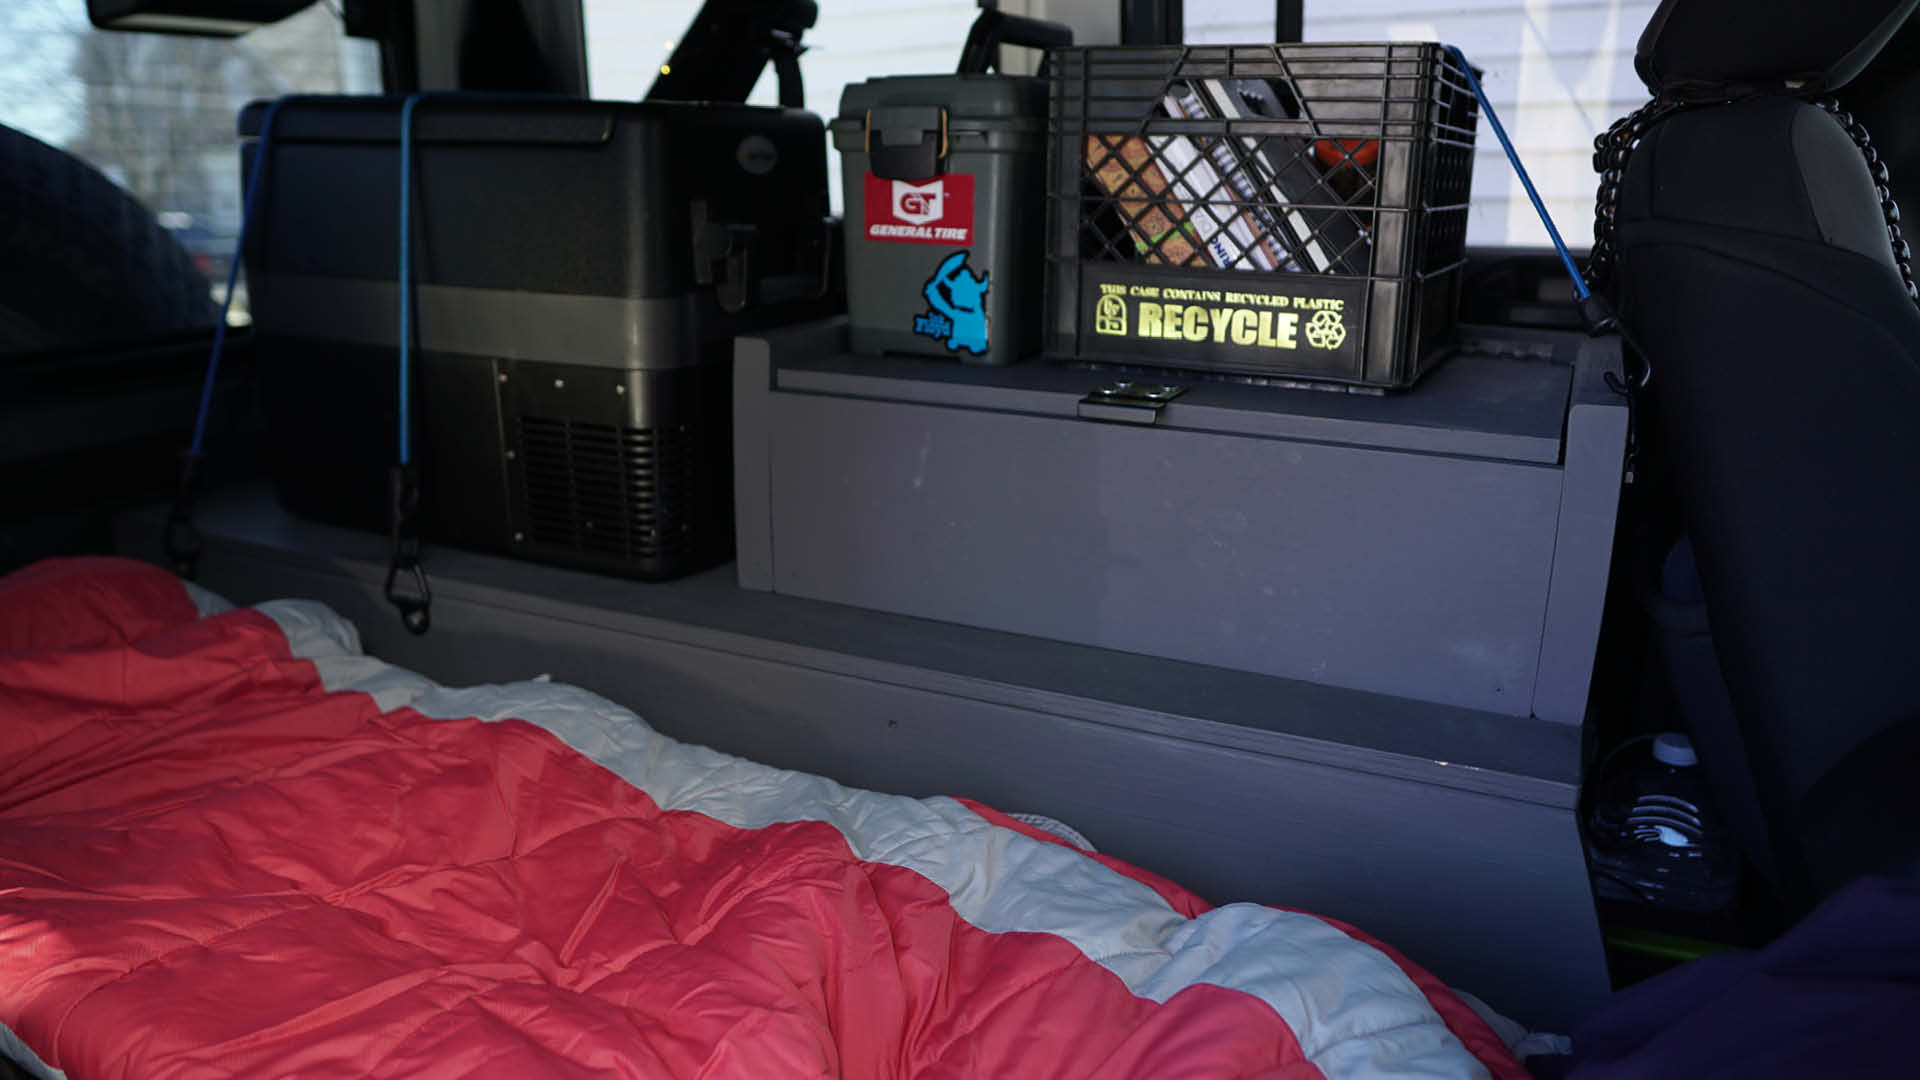
Step 9. Measure and construct the upper storage compartment. Make sure your driver seat is all the way back as needed and you take into consideration the window crank if you have Armstrong windows. I made the outer and back sides higher and inset the lid so that there’s a lip. This is nice because it helps keep crates and other stuff I put there in place. Bungies only do so much. Add piano hinge & top later after painting.
Next steps: Sanding & painting…finally!
Step 10. Sand down all edges quickly. Don’t skip this! Even though you’re painting, simply adding a little rounding and sanding to all edges helps a lot. Also, splinters can get stabby and air mattresses hate that sh*t.
Step 11. Paint everything and let dry completely! I used some cheap “mistake paint” from the paint department and it was like $5. I suggest getting a gallon and doing two good coats and making sure everything dries very well! Sticky wood is no good!
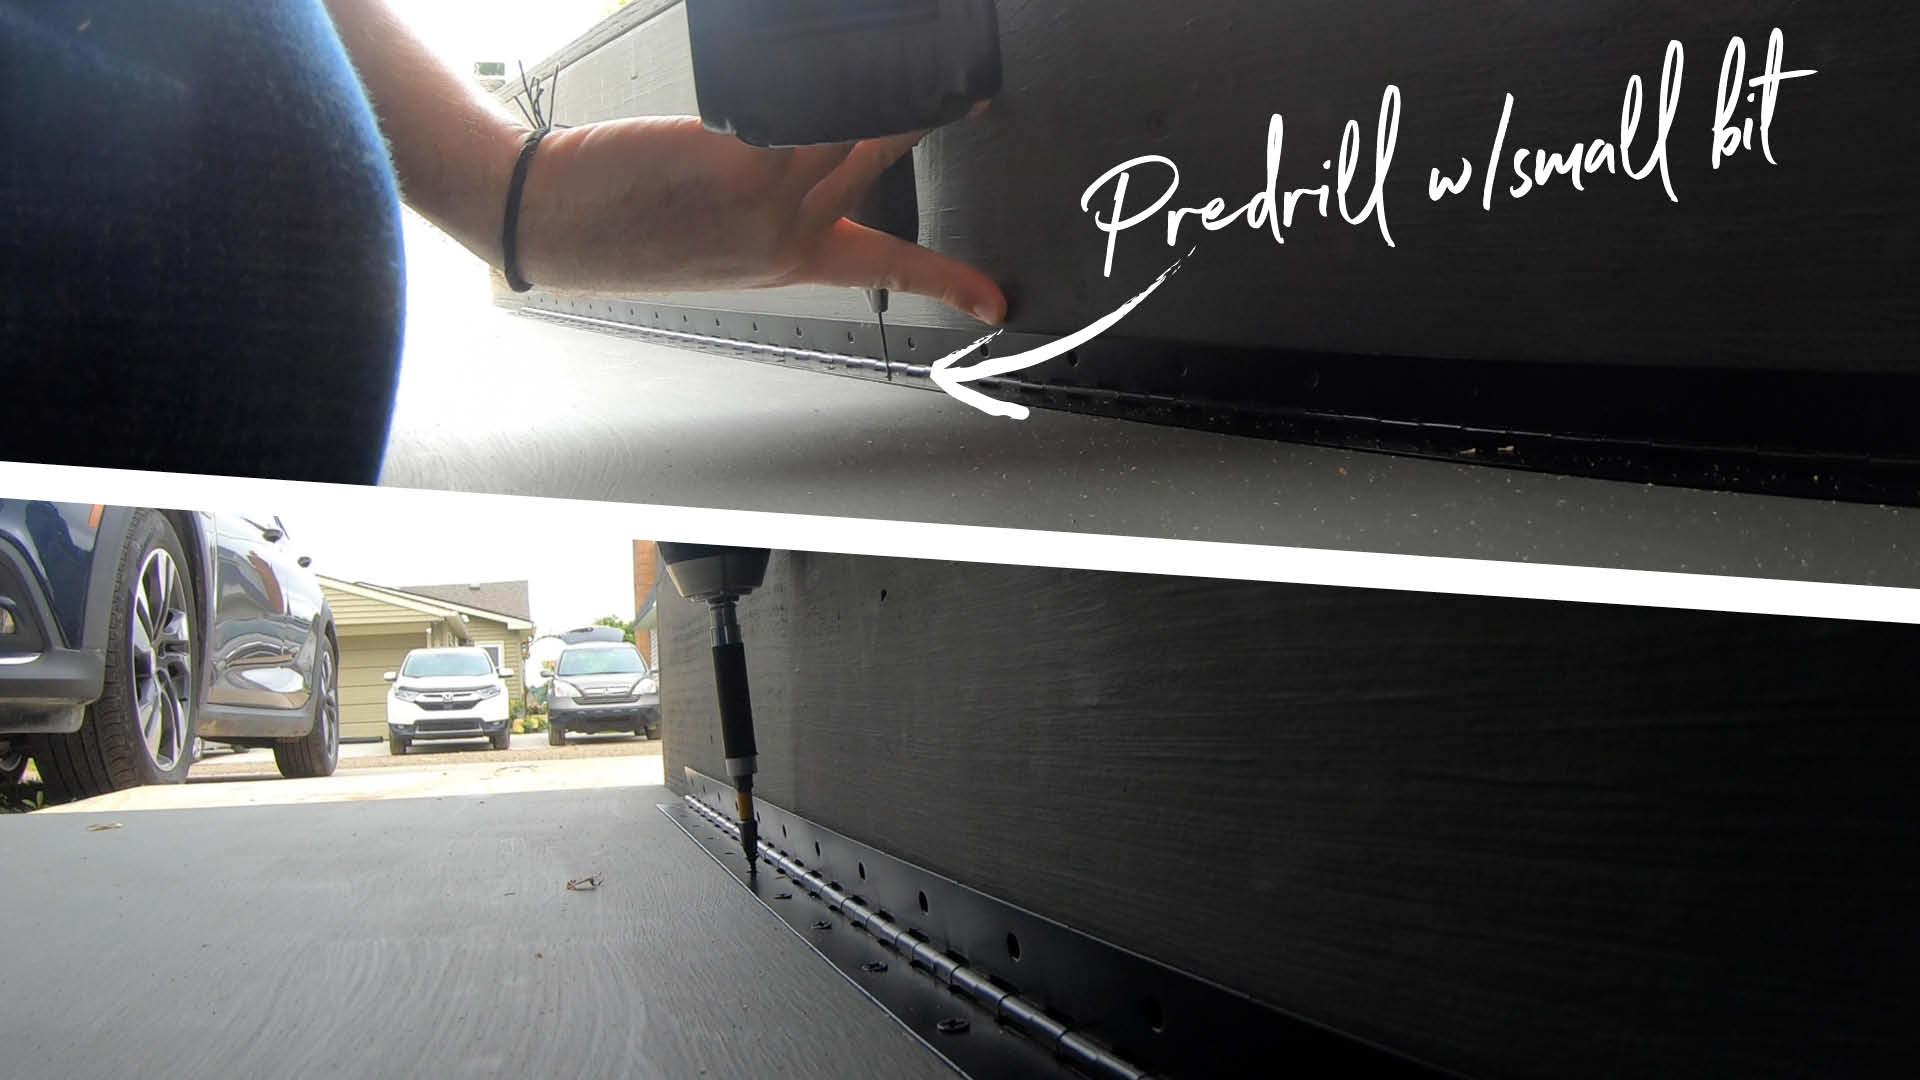
Step 12. Put it all together & add hinges! Set all pieces on flat, clean ground, and complete installation of the heavy-duty drawer slides and drawer. Take the drawer out until everything is done and in the Jeep later on. Use the supplied screws into the plywood and find some longer ones for going into the 2″x10″. Predrill a couple of the holes into the birch with a tiny drill bit just to get the 48″ piano hinge set in place then run the rest of the screws. Next secure the raised storage top. Grab a friend and put the whole bed & storage platform in your Jeep!
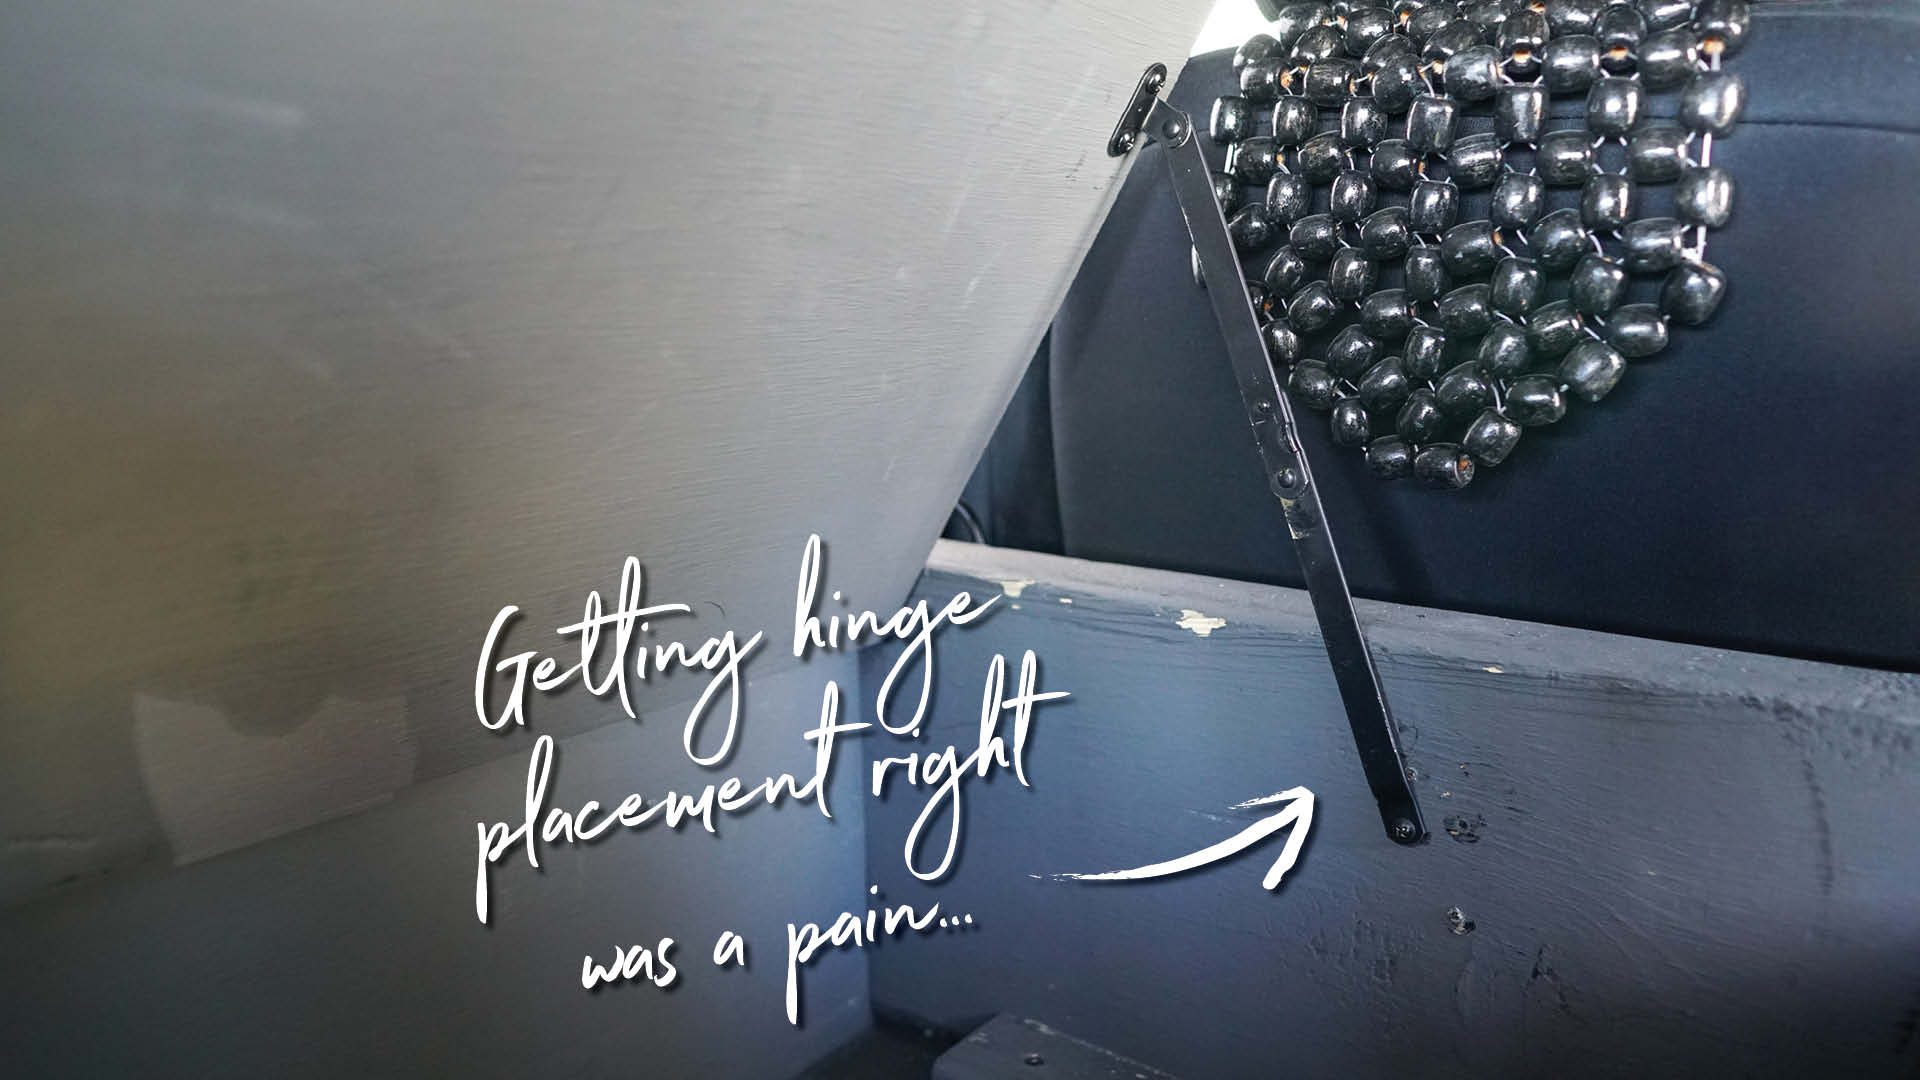
Attaching upper storage platform box & heavy-duty tie-downs
13. Set the upper box in place and attach it to the raised platform. I had some 2″x2″ strips that I used inside the box for this so I attached them from the top side. In theory, this makes it easy to remove this box by removing a couple of screws if needed.
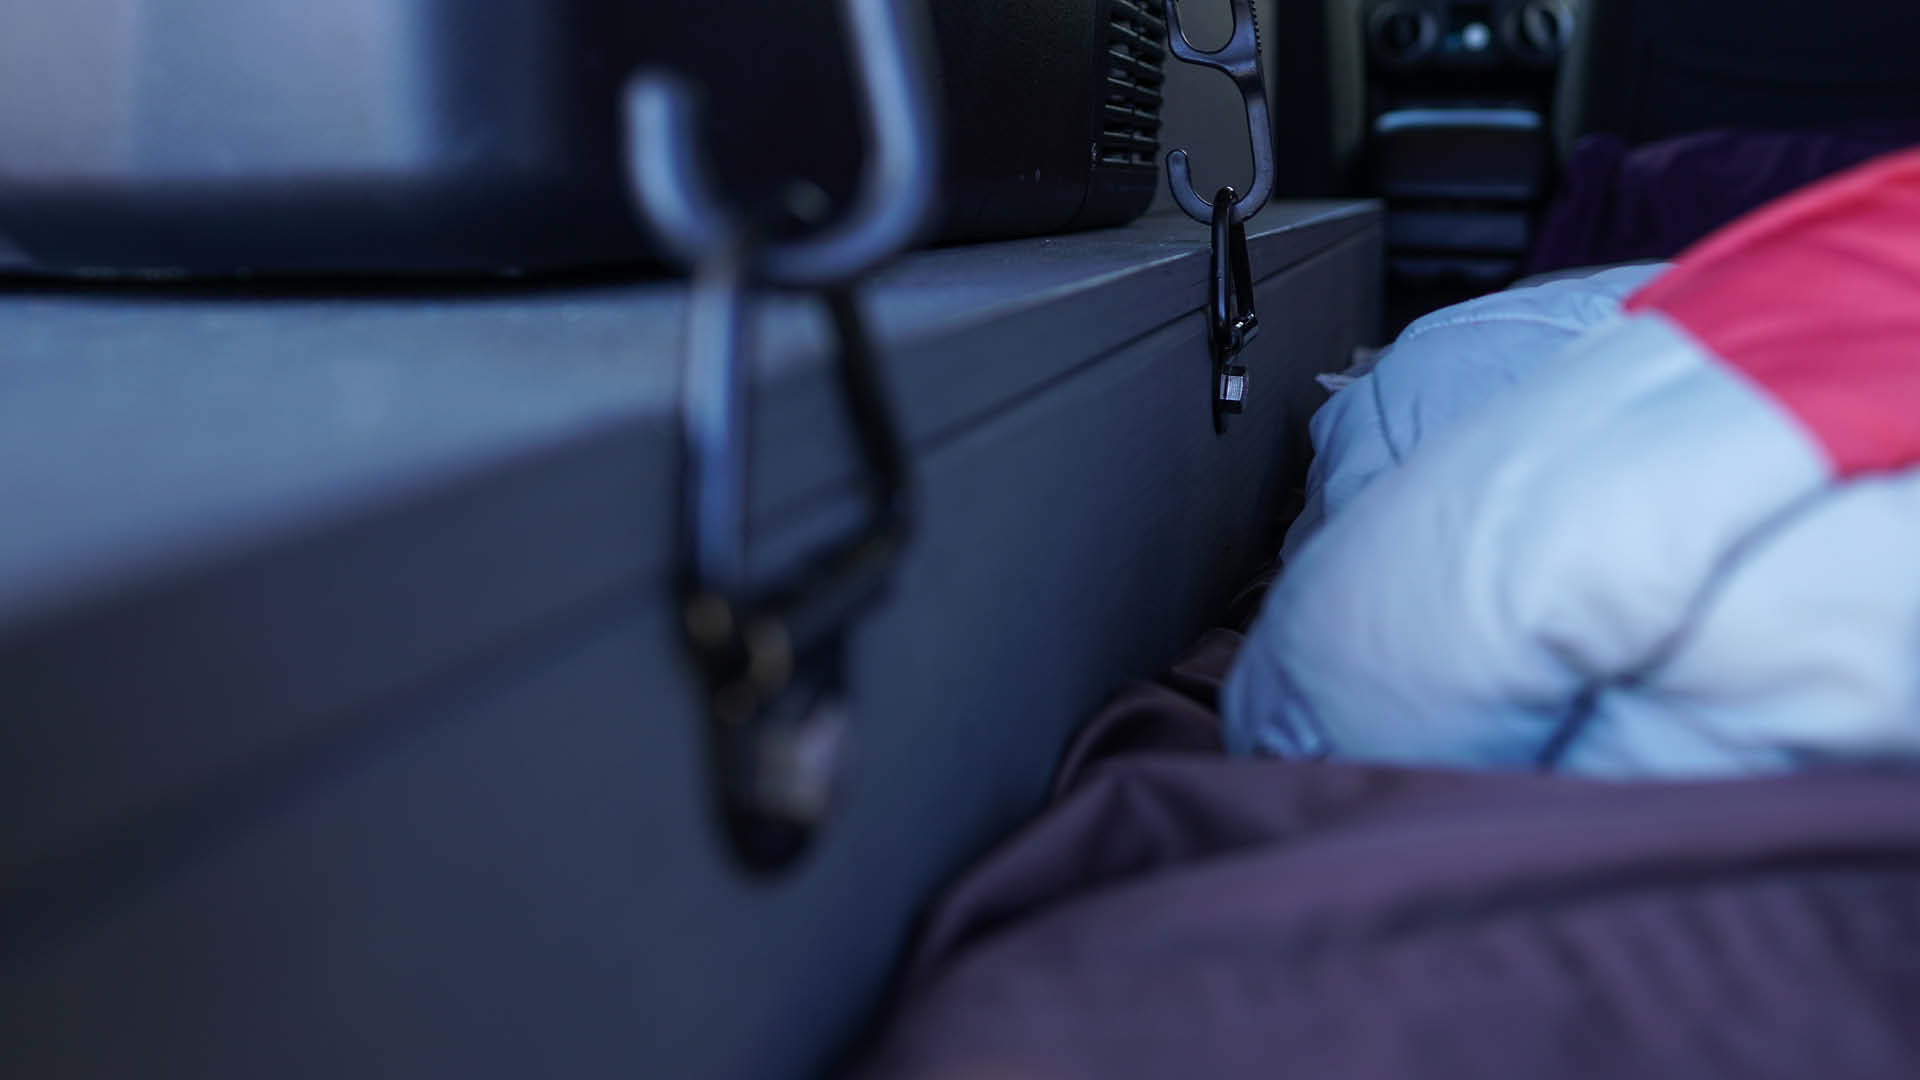
14. Set some stuff in place the way you’ll use your bed storage platform in real life and decide on the placement of your tie-downs. Install them suckers with some big old shiny bolts.
15. Grab yourself a beer and enjoy!
READ NEXT: DIY Jeep Wrangler Bed: Sleeps 2 With An RV Cooler Shelf—How-To Build It
Parting Thoughts on the Jeep Wrangler JKU Bed Platform 2.0 Build
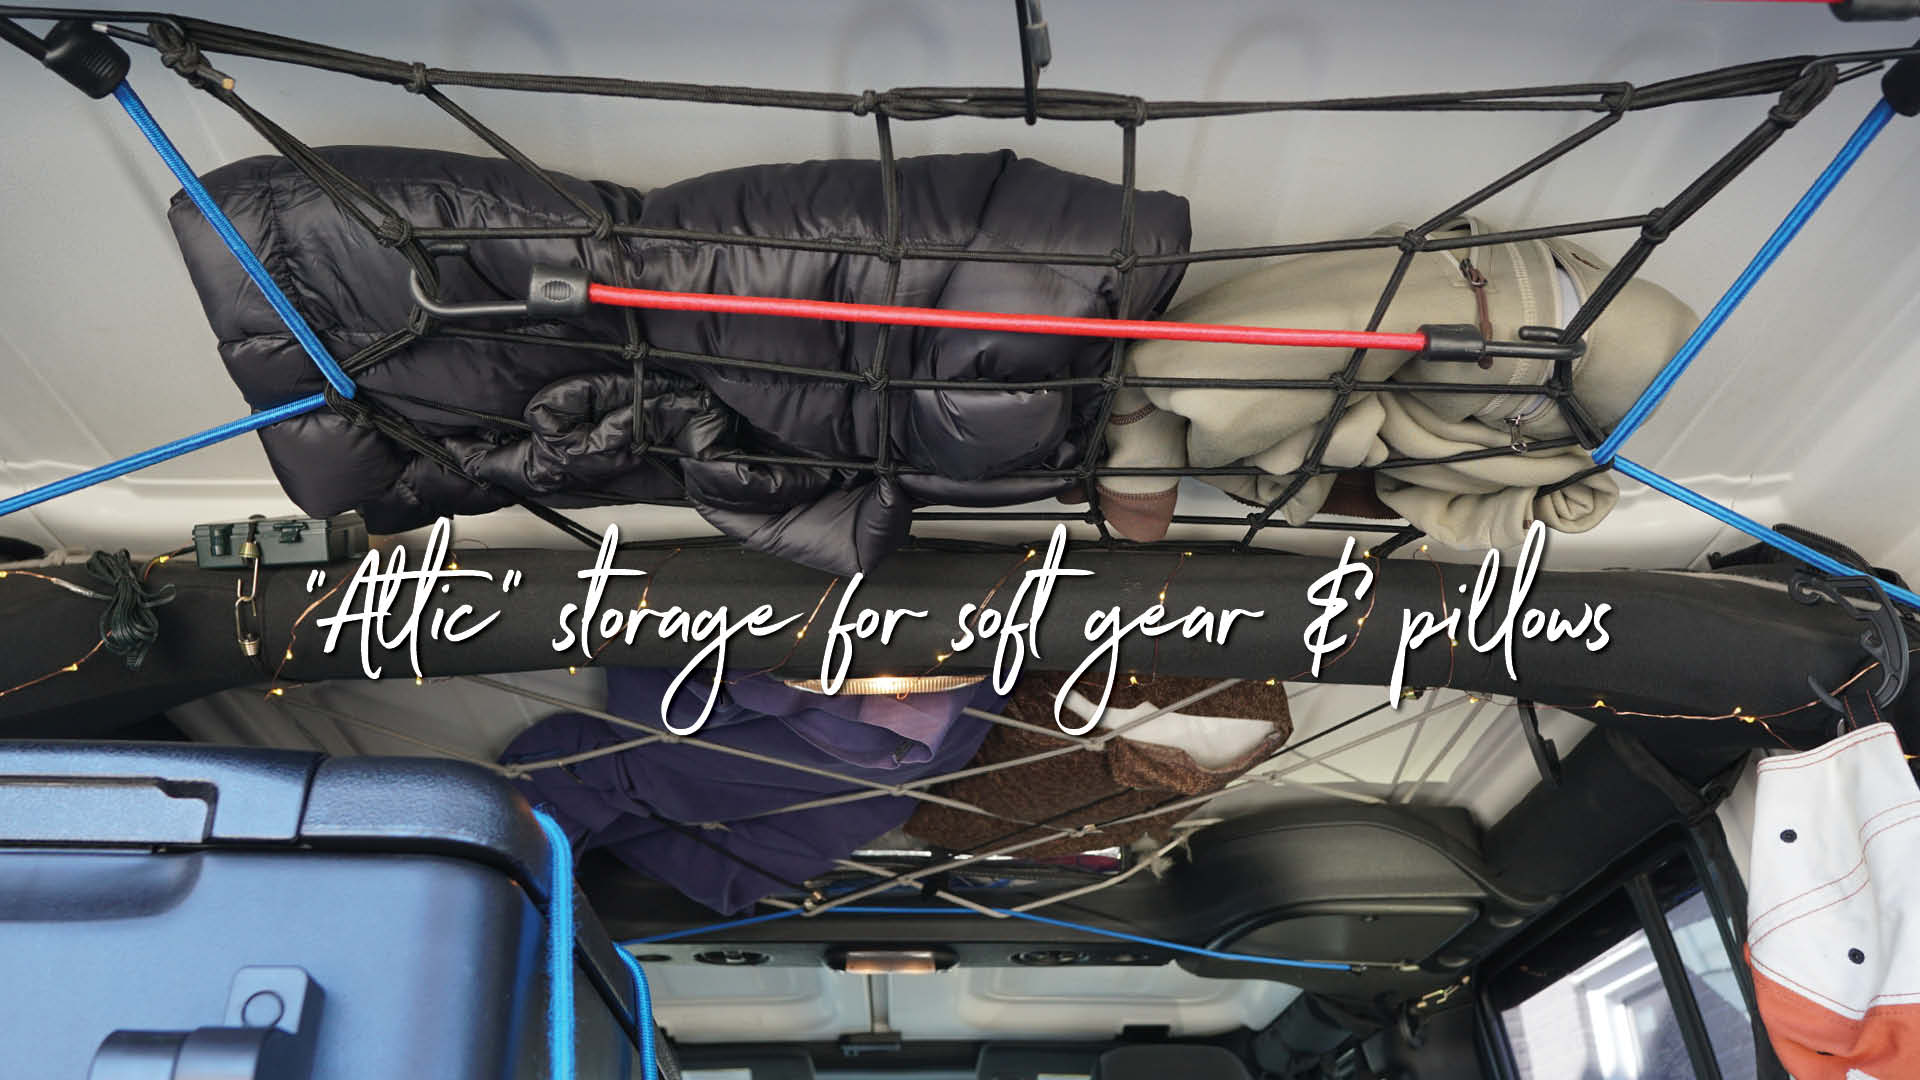
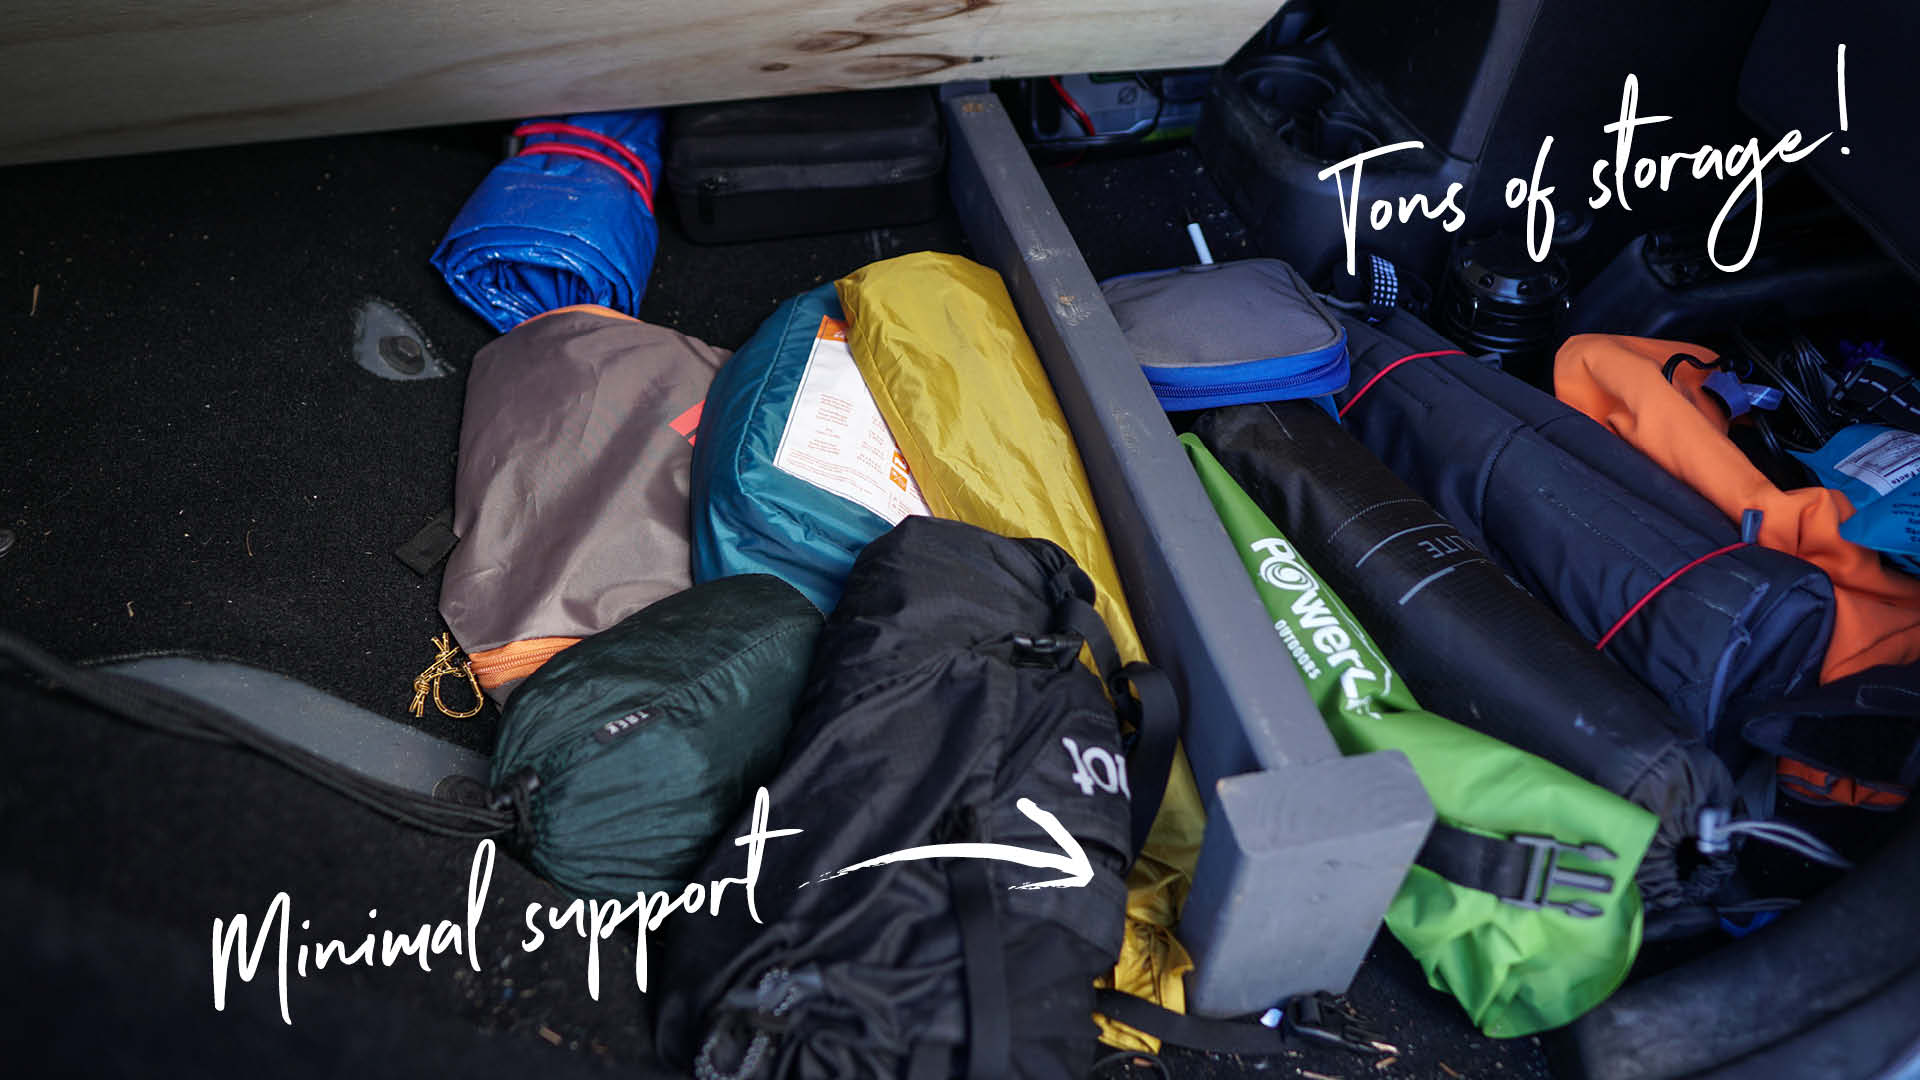
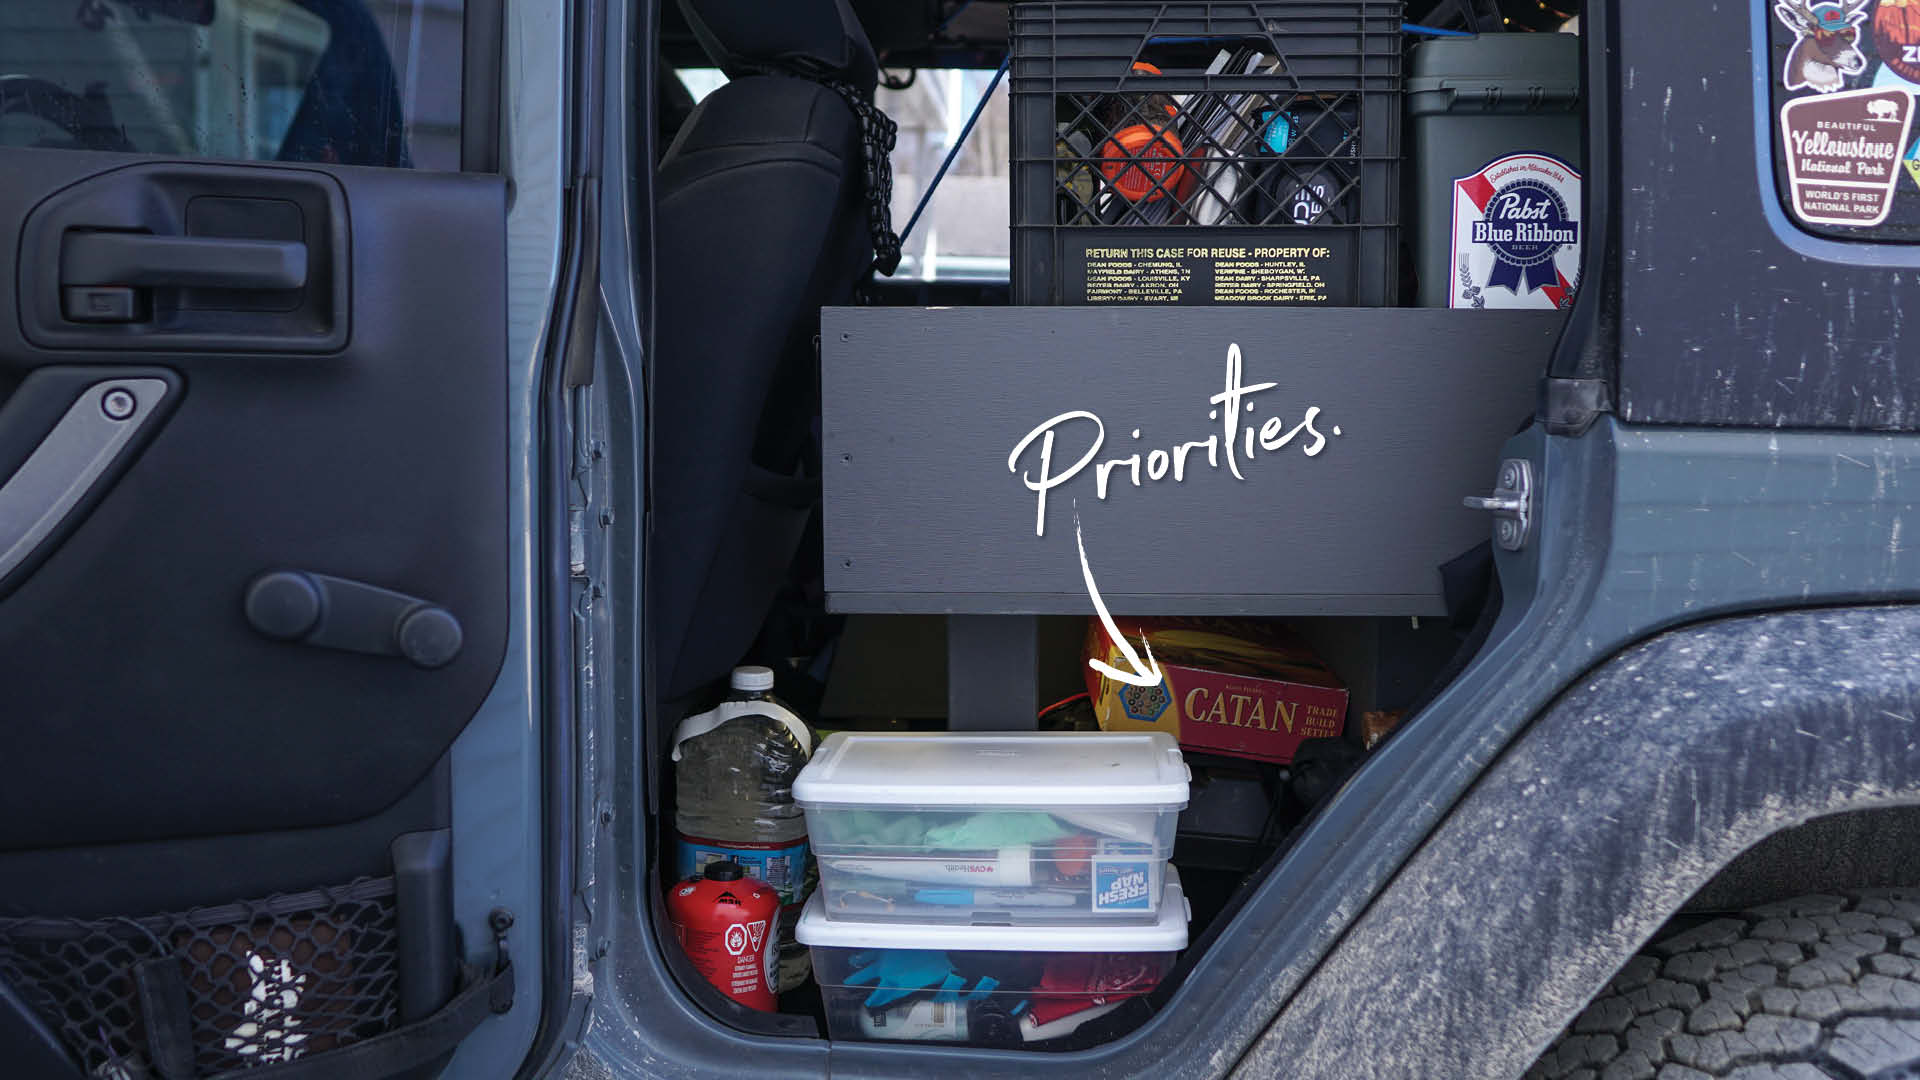
I love this build! Not only is this one super cheap to build, it really utilizes the space so much more than my old Jeep Wrangler bed storage platform. Things I need while in the Jeep are easy for me to get to, especially with the “attic storage” bungee net system rigged up. (Images below)
The metal tie-downs are inexpensive and really helpful. I was worried about the metal tie-downs jingling or making noise, but that’s never been an issue.
The fairly secure drawer storage is handy around town or when traveling. Again, I keep the really important stuff locked in a Tuffy lockbox.
What I miss from the old one: Not much. But I do see how I could make similar maximizations with a platform that would sleep two easily. Maybe I’ll build that one soon just for fun!
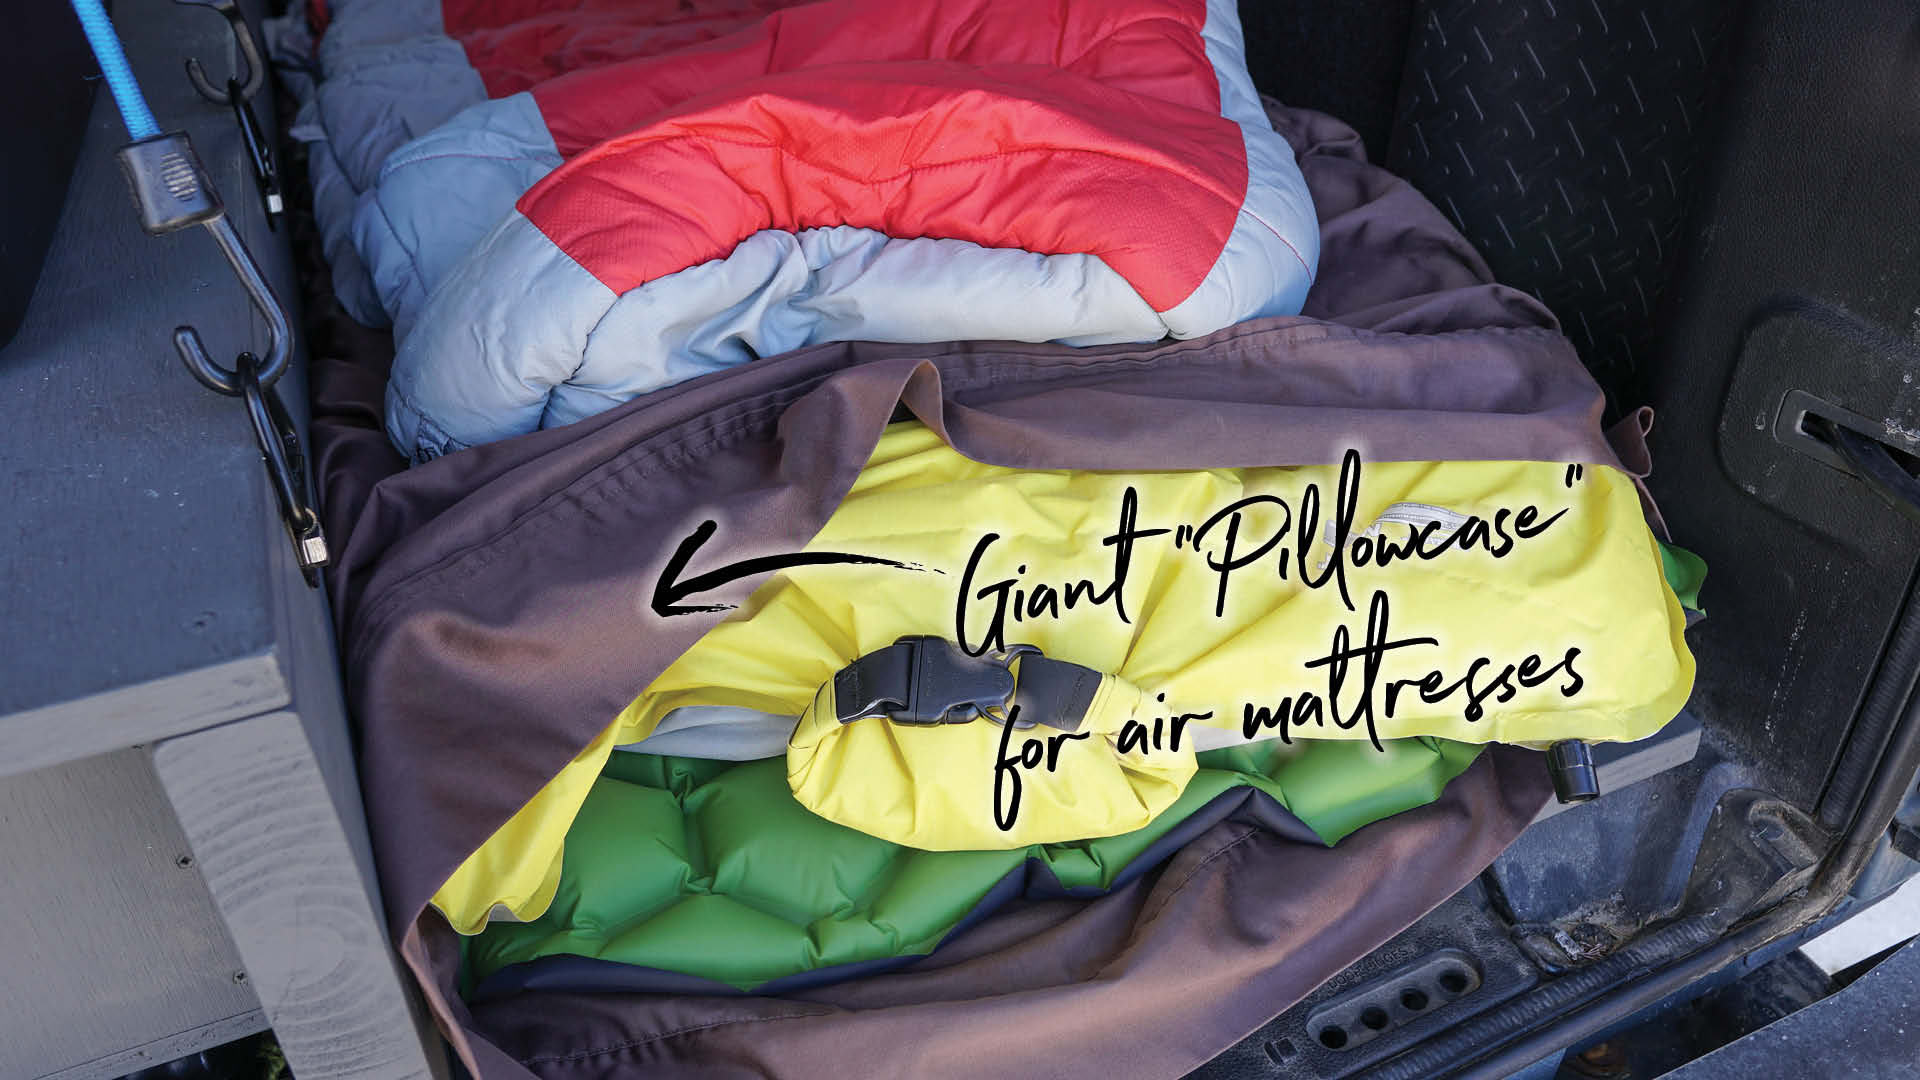
Did you notice the giant pillowcase for my air mattresses? This thing is awesome! I simply took a large sheet and had my momma sew it together. This not only protects my air mattresses from any splinters from the Jeep bed storage platform but also catches sweat! Easily cleaned to keep your Jeep Wrangler from getting too stanky!
Let me know in the comments if you build this and whether you make any changes or modifications that make it better! I’m just a hack monkey with some power tools, so I know there are better ways to do things than the way I do ’em’!
Other Gear & Accessories Seen On/In My Jeep Wrangler JKU
| Things & Stuff… | Purchase Links | Notes |
| 42 Quart RV Chest Cooler | Amazon | Still great after 3+ years of use |
| Bungie Nets – Attic Storage | Amazon | Not mine, but these look better sized |
| Thermarest Insulated Sleeping Pad | Amazon | Warmest pads I’ve ever used! |
| Powerlix Ultralight Sleeping Pad | Amazon | Thin, but good backup/extra pad |
| Goal Zero Yeti 400 | Amazon | See Full DIY How To Article Here |
| Heatshield Custom Fit Windshield Shade | Amazon | Worth the money |
| Coverking Custom Fit Seat Covers | Amazon | 6+ years running now… |
| Ammo Field Box | Amazon | Spare gear/parts storage |
| Thule Gutter Foot Pack | Amazon | |
| Thule Square Load Bars 60″ | Amazon | |
| Thule Force XT Cargo Box | Amazon | |
| Thule One-Lock Cylinders | Amazon | Worth it for a single-key system |
| Tuffy Metal Under-Seat Lock Box | Amazon | LOVE these heavy-duty lockboxes |
Make sure you’re using these just as recommendations and fit your specific vehicle and needs to find what’s right for you!
Cheers!
— Jason
Connect & Share This Article
Travel Planning Tips
Figure out where you are going & how are you getting there…
I suggest using at least 2 to 3 different travel search sites. Start with Skyscanner or Orbitz or Booking …or whatever aggregator site you prefer. Then when you see what airlines to use, check their respective sites for better deals or rewards flights.
Figure out where you’re going to stay…
If you’re interested in hostels, search Hostelworld or Hostelling International. For longer-term or more private digs, look at Airbnb, VRBO, or you can look for hotel rooms in the links from the search engines listed above.
Get comprehensive travel insurance, or in the least, travel medical insurance if internationally…
Especially with Covid not going anywhere, get covered. Start with an insurance aggregator like Insure My Trip, or with SafetyWing, World Nomads, or another. Then decide what is important to you; trip cancellation, baggage coverage, medical, or all of the above. And get a yearly evacuation plan, since you’ll have to get home after your emergency!
Need more resources? Click here!






Hi! Thank you for sharing. This is impressive and inspiring. I’m wondering if you could recommend ways to obtain a converted jeep that is for sale? I have been doing some searching. I live in the bay area but could move around. I don’t have much experience with woodwork/conversion and would prefer to invest in someone else’s work as things are today. Thank you!
Unfortunately, that’s a toughy. Considering the amount of work plus materials, they wouldn’t be cheap to sell/purchase. Maybe find a friend with tools and the willingness to help build for a couple of delicious beers? With two sets of hands and all the materials on site, it should only take a day, minus paint. Honestly a pretty simple build! I did it solo so it took a couple days, plus I didn’t have but some sketched plans. Good luck!
Enjoyed this write up. Thinking of something very similar. Curious, have you changed anything, did you go for two again?
Go for two? You mean a third build? I haven’t changed anything on this bed build and I’m extremely happy with it after many nights in it. That said, I do have a plan for a hybrid that has a slightly raised bed that’s flat, very little structure underneath, still has pull-out storage, and a “transformer-like” platform for the RV cooler that would let it pop up at night when not in use, thus accommodating two people sleeping. Always tinkering!
Hi Jason🙂, I likes your article, I Always love customizing vehicle for our needs, informative for travel enthusiast like me, thanks and keep sharing such article.
Appreciate it. Glad you got something out of it! What are you modifying?
This is such a great idea! I love the detailed instructions and the photos really help visualize the process. Can’t wait to try this out on my next camping trip! Thanks for sharing!
Glad it’s helpful for you!
What an awesome idea! I never thought about turning my Jeep Wrangler into a sleeping space. The detailed steps and photos you provided make it seem so doable. I can’t wait to try this out on my next camping trip! Thanks for sharing!
This is such a fantastic idea! I love the versatility of the Jeep Wrangler, and turning it into a mini camper is genius. Your detailed instructions for creating the bed platform and storage are super helpful. Can’t wait to try this out for my next road trip! Thanks for sharing!
I love the idea of turning my Jeep Wrangler into a cozy sleeping spot! The bed platform looks super practical, and I’m excited about the storage solutions you shared. Can’t wait to try this out on my next camping trip! Thanks for the detailed guide!
This is such a creative and practical solution for camping in a Jeep Wrangler! I love how you’ve outlined the step-by-step process for building the bed platform and maximizing storage. Can’t wait to give this a try on my next adventure—thanks for sharing!